Thank you for taking a look at our product. If you prefer using a video as a guide, click here.
This article will serve as a quick start guide to show you how quick and easy it is to create your own slideshow for a digital display to put in your store.
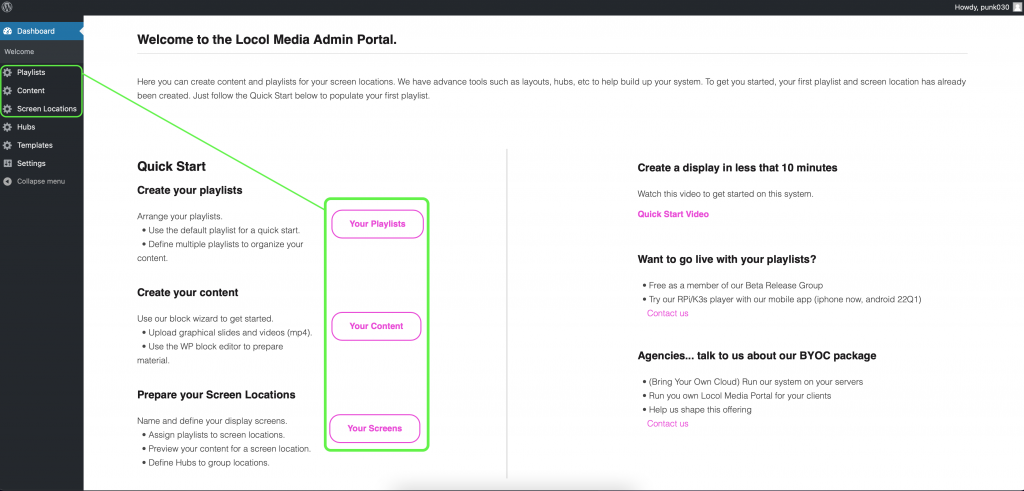
Below is an example of our dashboard. The three key functions are highlighted; we will be focusing on these tools. They include:
(Your) Playlists: Slideshows are organized here.
(Your) Content: Slides are created here by uploading content or using WordPress blocks.
(Your) Screen Locations: Select which of your physical locations will feature any of your slideshows.
Both the Quick Start buttons and the tabs on the far left will take you to the same relative locations.
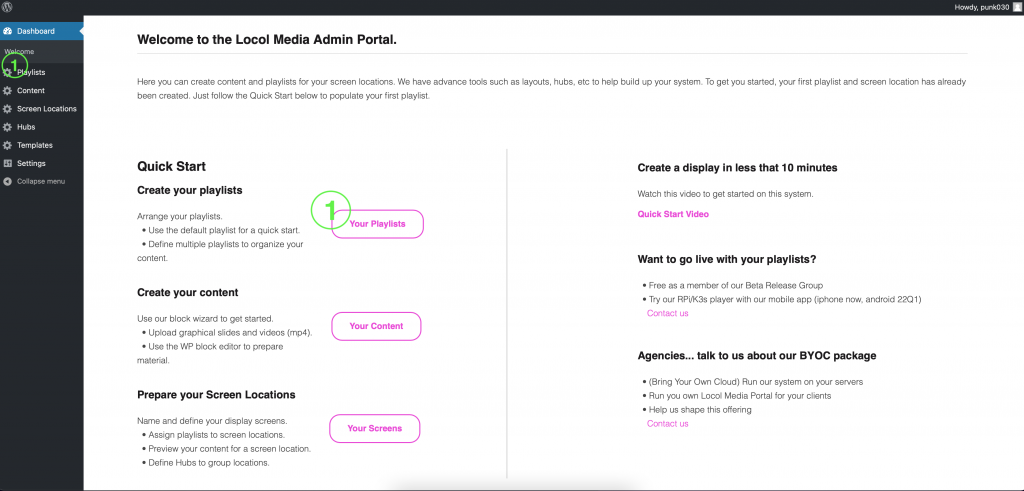
Step 1 – Playlists
We’ll start by creating your first playlist. You can access this by either clicking on the Your Playlist button or the Playlist tab on the far left.
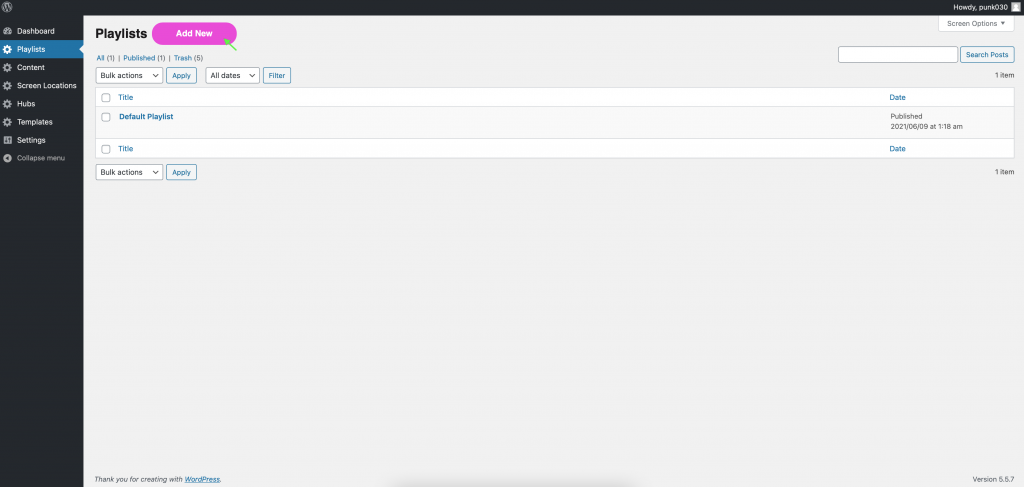
Once inside Playlists, you will see the Add New button. Click on this to create your first playlist.
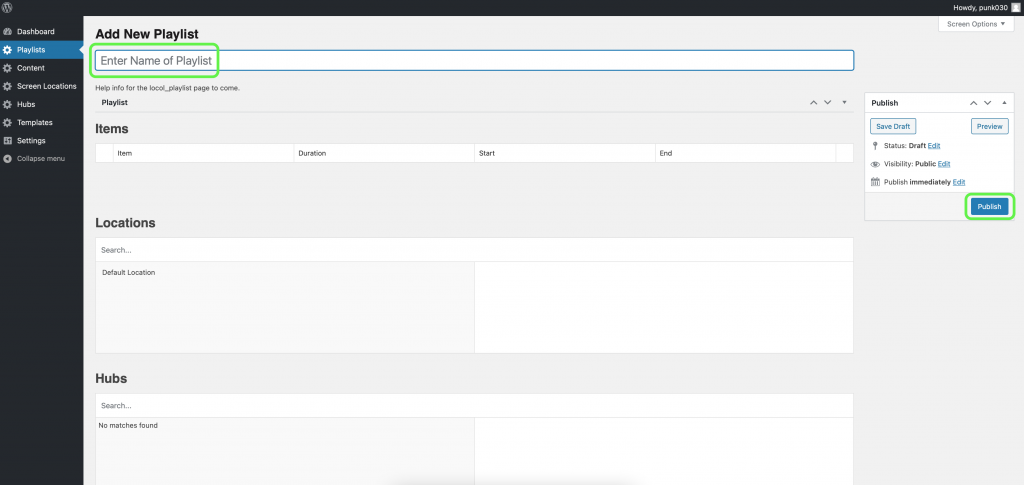
Start by giving a name to your playlist. Then click on the Publish button on the far right. This is all you need to do for the time being with your playlist.
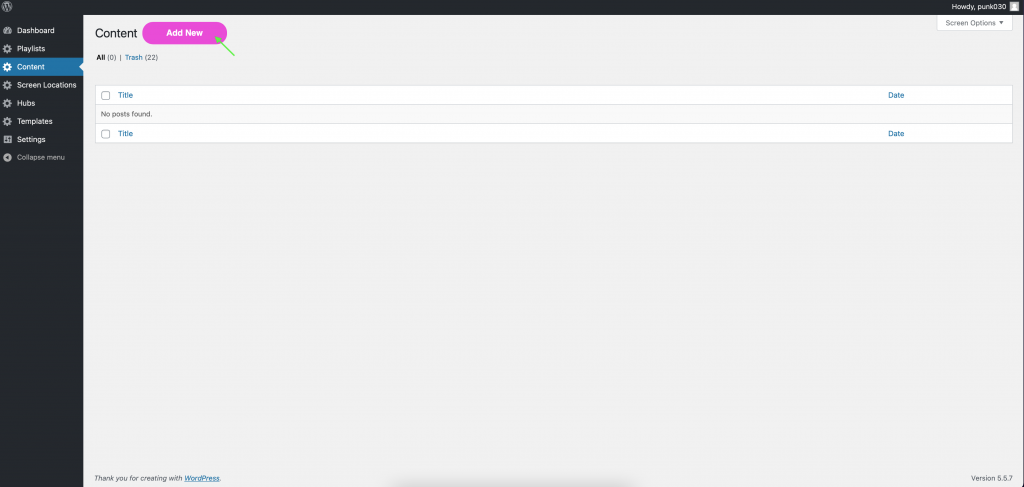
Step 2 – Content
Click on the Content tab on the far right to take you to the Content creation tool. Once again, you will see an Add New button to click on.
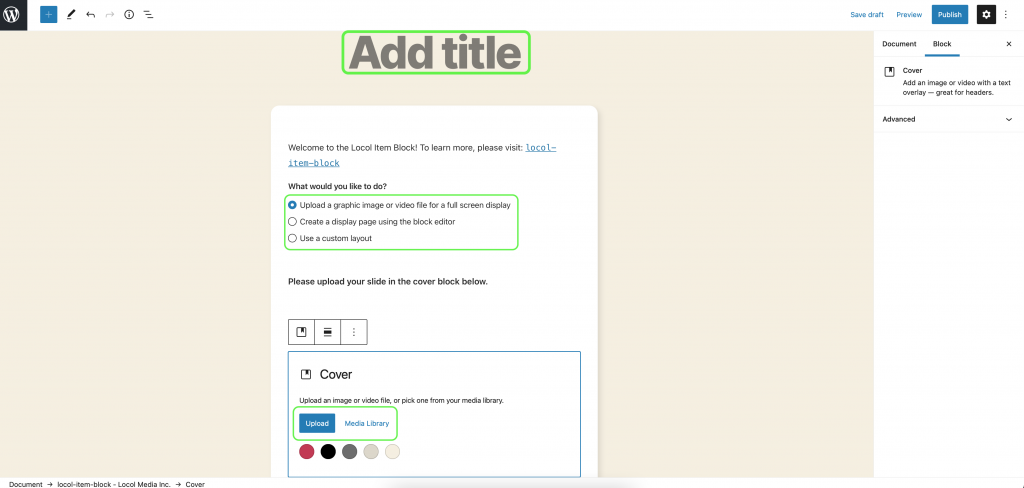
Inside Content, WordPress professionals will see a familiar block editor. Here, you can start by creating a title for this slide.
Next, select how the slide will be made. For this guide, let’s focus on the first selection, let’s assume that someone has created an image for a slide to put up and choose “Upload a graphic image or video file for a full screen display.”
You can then go the section below and either click on the Upload button to bring in some new content or (if you have already uploaded some content) Media Library.
Once done, scroll down for further options. Select which playlist you would like this slide to be placed in (for this example, “A Restaurant”). Note that you will receive a warning automatically if you haven’t chosen a playlist.
Next you see the duration this slide will appear on the display. Our default is 8 seconds, but you can type in any number of seconds you prefer.
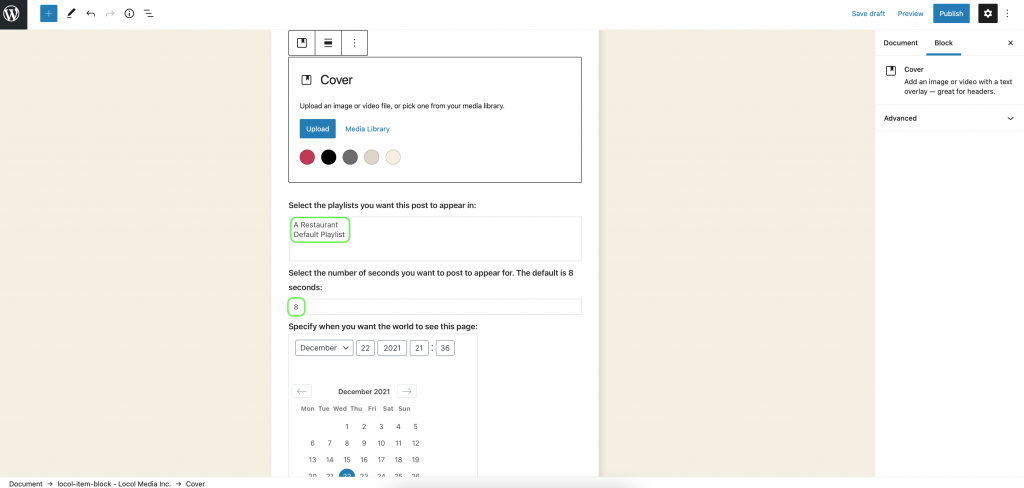
Finally, you will see two calendars that allow you to choose the start and end dates as well as times for when this slide will appear. Keep in mind that the start and end is for each slide itself, and not for the playlist. This is because we expect most slides you will create will be for special deals and offers that each have varying durations. After the deadline has passed, the slide will automatically be removed from your slideshow.
Once you’ve selected the time and dates for your slide, you can click Publish. You’ll need to click it twice to confirm. After that, you can click on the WordPress Logo to go back to the Content screen.

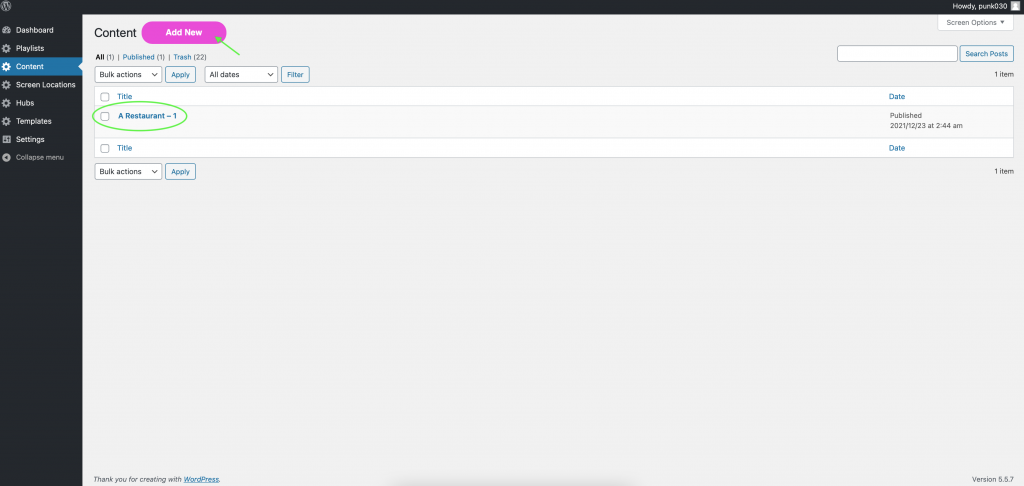
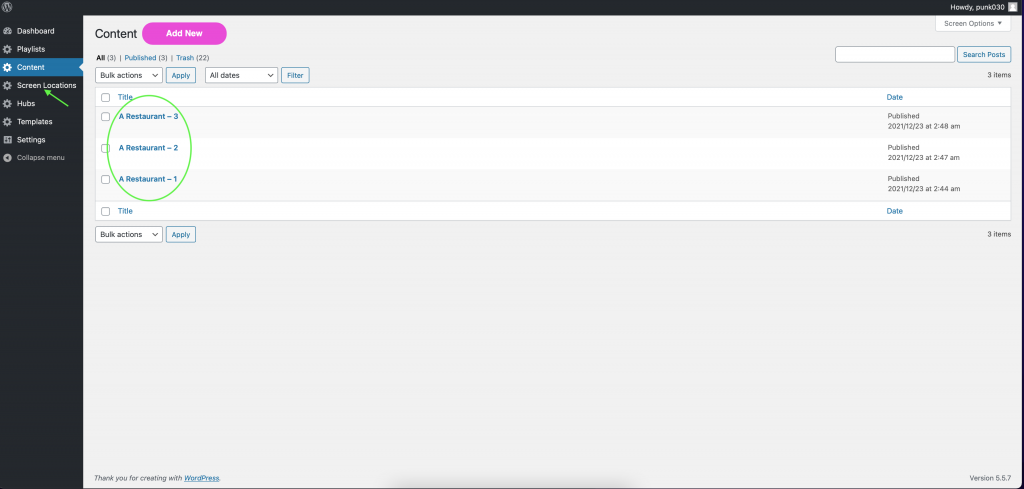
You’ll notice in our example that there is only one slide created as an example so far, “A Restaurant – 1″. If you want to create more slides, you will need to click on Add New once again for each slide you want.
As you can see below, three sample slides have been created for “A Restaurant”. Now that we have a set of slides, we can click on the Screen Locations tab to finish things off.
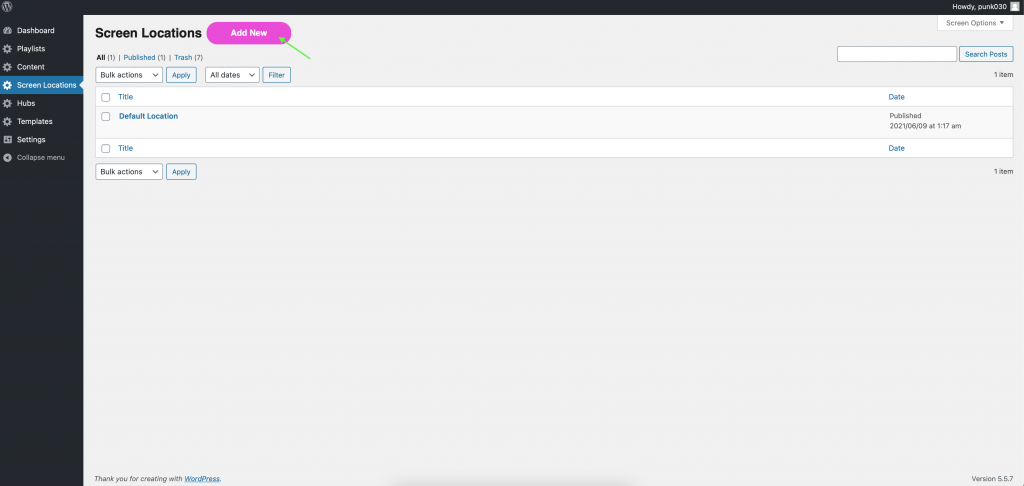
Step 3 – Screen Locations
After clicking on the Screen Locations tab, click on Add New to finalize the process.
Give your new Screen Location a name. In general, the store address or another unique identifier would be most useful.
You can also enter in the screen size based on the resolution of your display. By default, the given size is 1920x1080.
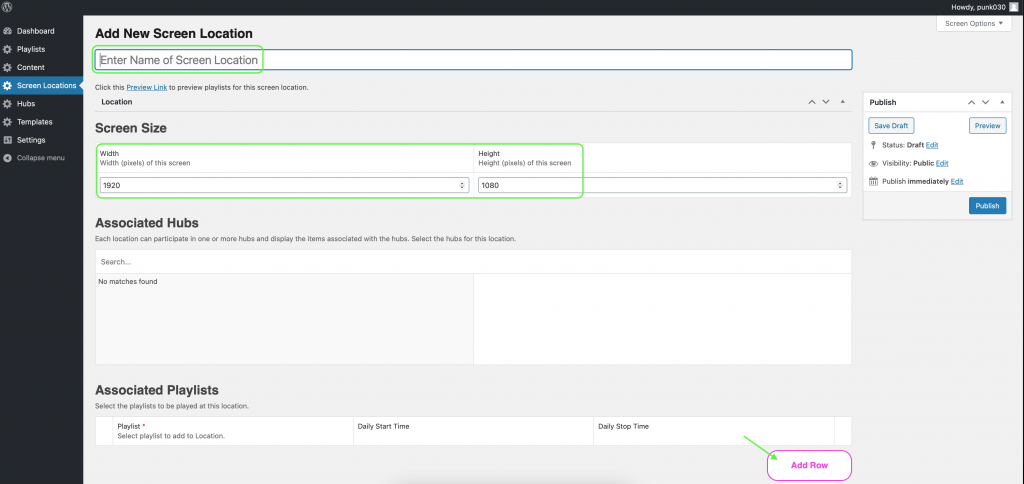
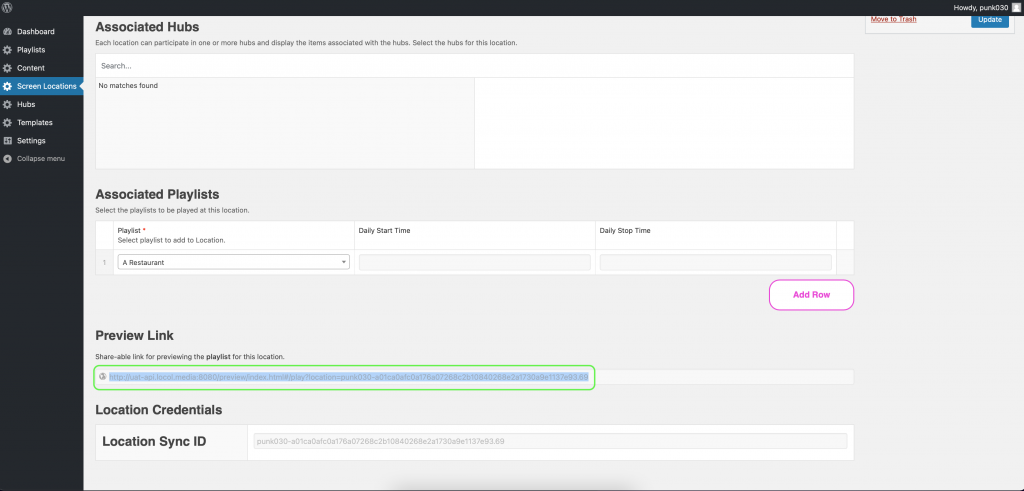
Finally, look at the “Associated Playlists” section at the bottom and click Add New.
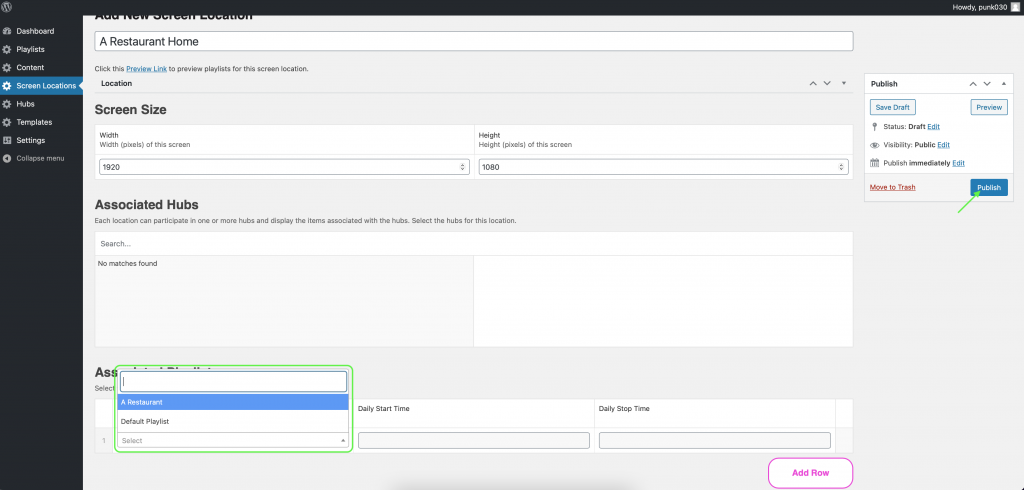
The box will let you choose from a list of Playlists that you have already created (this example uses “A Restaurant”). Once you have selected the appropriate playlist, you can click Publish on the right.
Once you have published this Screen Location, you can check on your slideshow in the Preview Link section. You will find it below the Associated Playlists section. All you need to do is highlight the link, copy and then paste it into a new tab on your browser (this is not a clickable link). The preview will show your slides exactly in the order and duration you created them.
Additional Tools
As an extra step, if you ever feel the need to change the order of your slides, you can go back to the Playlists tab and find the Items section. By grabbing onto the left anchor, you can drag and drop each slide according to any order that you like. Remember to click the Update button to save these changes.

Congratulations, you have created your first slideshow for your store! We will be publishing other articles for you that will expand on these tools and how you can further customize your display. See you in the next one!