There are two ways to create content for the Locol system. Content can be created in this part of the system, or content can be pulled from a website using the Locol Item Block plugin.
There are three options to creating a slide. The first option is via graphical files uploaded to the portal. In production, the player agent pulls all the option 1 files onto the player computer. When a Screen Location only has option 1 slides, the screen location can play continuously even if the WiFi access is unavailable.
Using the Content Menu
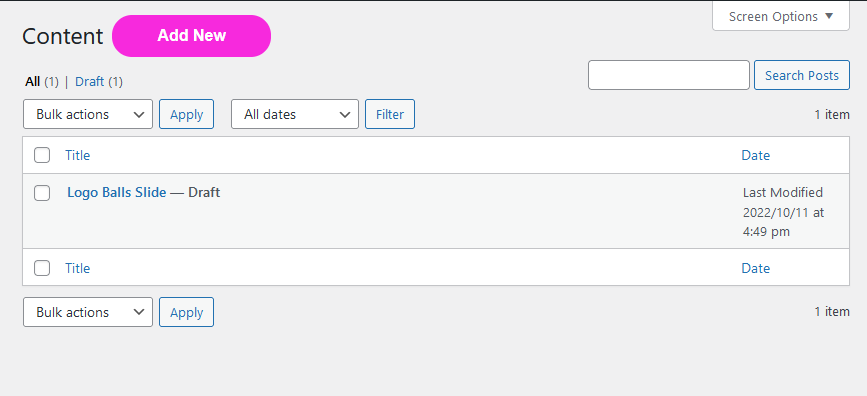
Select Content from the navigation menu.
The content list is sorted by create date and in descending order.
To sort by Title or by Date in ascending or descending order
Mouse over the Title field, click the upward arrow to sort in ascending order, and click the downward arrow to sort in descending order.
Mouse over the Date field, click the upward arrow to sort in ascending order, and click the downward arrow to sort in descending order.
Creating New Content
Click the Add New button next to the title Content.
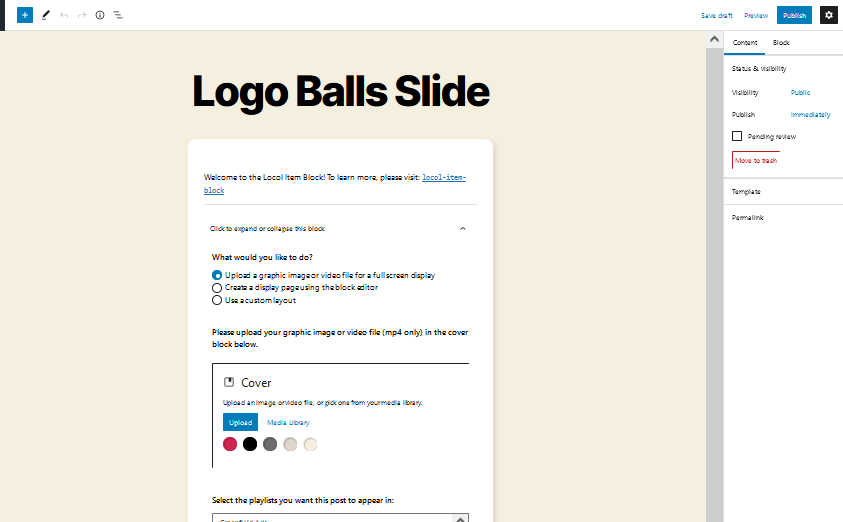
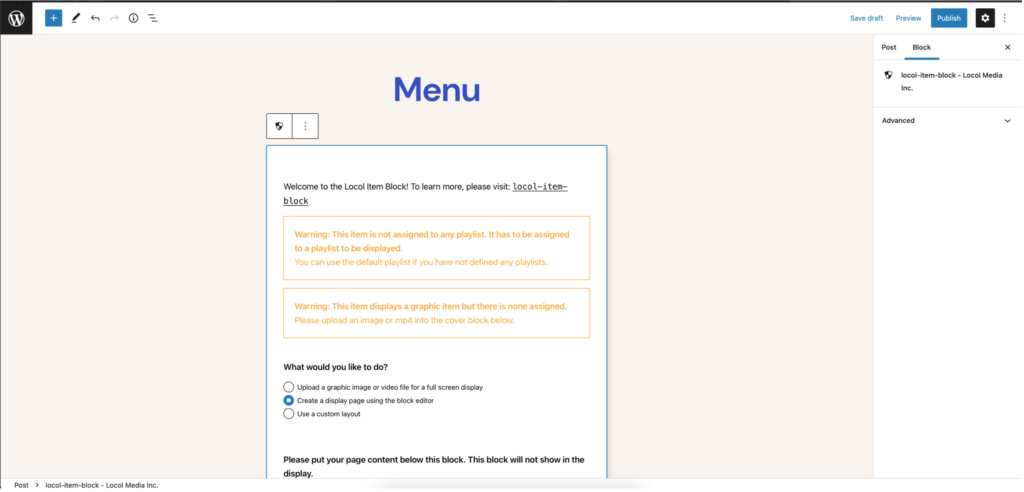
Continue with the content creation by filling in the fields in the Locol Item Block already on the page
To add content with the Block, select option 2 and create the content below the Locol Item Block.
The Locol Item Block
The following are the fields within the Locol Item Block
The Selection Section
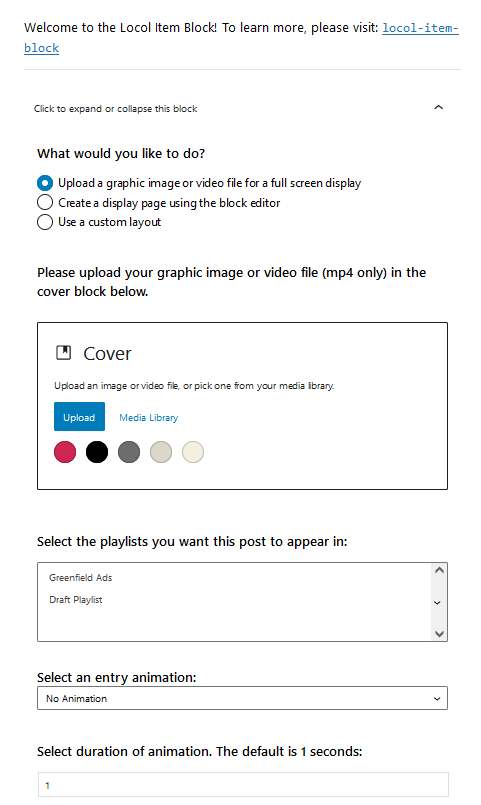
There are 3 options to easily build rich, eye-catchy content for a playlist.
Option 1 uses a graphical file or a .mp4 video file for a full-screen display. The file needs to be uploaded to the media library or is already in the media library. With this option, the graphical file is also saved inside the player agent (Raspberry Pi or other computers) so that WiFi access is NOT required for this slide. A Screen Location with only option 1 slides can play continuously even if the WiFi access is unavailable.
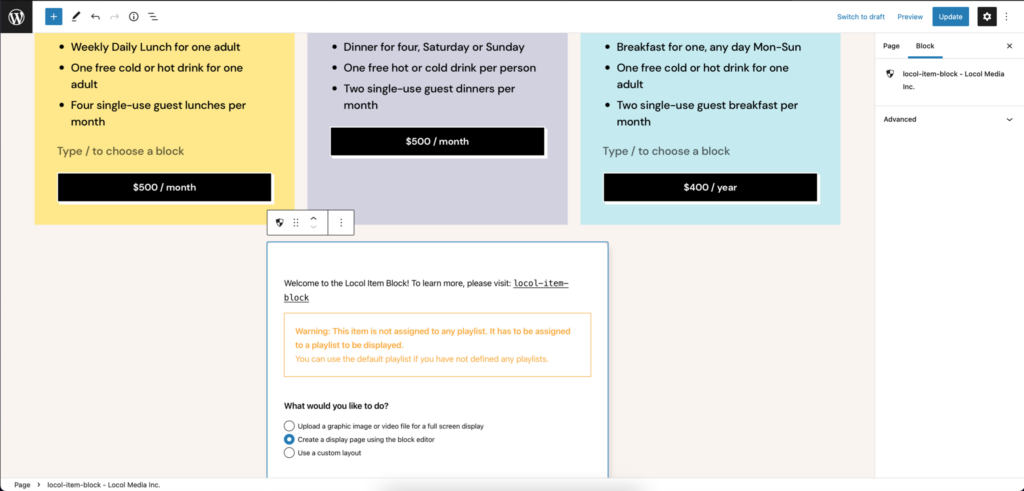
Two warning messages are possible:
Warning: This item is not assigned to any playlist for displaying.
Warning: Graphic image or video file has not been uploaded.
Once a file is uploaded the ii. warning disappears.
Once a playlist is selected from the Select Playlist Block, the i. warning disappears.
Option 2 uses the Gutenberg block editor to build rich content as a web page. It only has the i. warning message from above. Please the content below the Locol Item Block.
Option 3 uses a customized layout that is created in the Template menu. This feature is only for the advanced user. See the Template menu section.
The Cover Block Section
Load the graphic file or mp4 video into the Cover Block when using Option 1.
The Playlist Section
Content can be assigned to one or multiple playlists.
To select a playlist, click on the desired playlist.
To re-select, simply click on another playlist.
To multi-select, press the Ctrl button on the keyboard and click the desired playlists.
The Animation Section
This controls the animation effect on content item entry onto the screen. The default is “no animation”
There are 20 effects to choose from.
Click on the dropdown box to see the full animation list.
The animation effect can be seen when previewing the playlist, though not previewing a single content item.
The default duration of an animation effect is 1 second. Overtype for a different animation duration.
The Content Duration Section
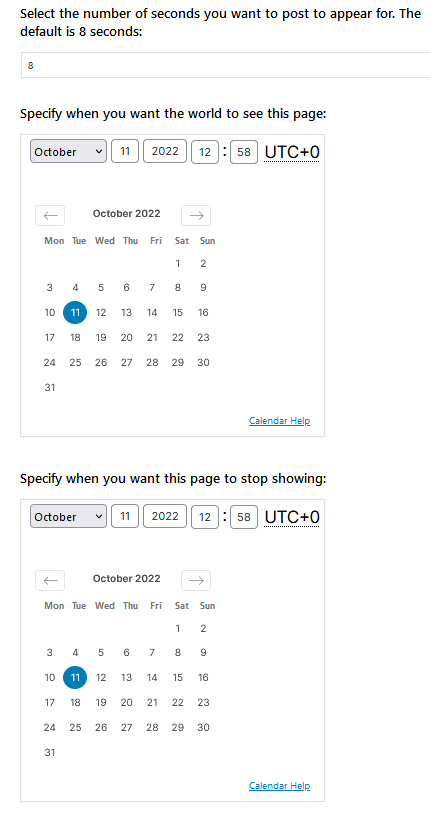
The default duration of a content item is 8 seconds. This means the content stays on a screen for 8 seconds
To increase or decrease the duration time, overtype with a new number in the time field
The Start-Time and End-Time Section
The system runs in the UTC time zone.
Leave both fields empty to play the item forever (until deleted). Otherwise specify a starting date-time, an ending date-time, or both.
Saving a Content Item
A Content Item can only be used in production when it is Published.
To save work before it is ready for production, use Draft mode.
The Save Draft button and Publish button are changed to the Update button for a saved Content Item. Click the Update button to save your changes.
Click on the Save Draft button to save the Content Item in draft mode. To change the status from draft to published, simply click on the Publish button. To change the status from draft to pending review, click the Edit link next to it, select Pending Review from the dropdown box and click on the OK button to save, or Cancel to exit.
Click on the Publish button to publish the Content Item for use. The published date and time are shown. To change the status from published to pending review or draft, click the Edit link next to it, select Pending Review or Draft from the dropdown box and click on the OK button to save, or Cancel to exit.
Visibility is set as Public by default. A Content Item needs to be public to be used. Click the Edit link next to it, select Password Protected or Private, and click on the OK button to save, or Cancel to exit.
Searching for Content Items
There are several ways to search or filter a Content Item list
Screen Locations are grouped by All, Published, Draft, Pending, and Trash boxes. Each box has a count next to it.
Wildcard search – key in some keywords in the field below the profile pic and click on the Search Posts button.
Filtered by create date – click on the All Dates dropdown box, select month and year, and click on the Filter button.
Editing a Content Item
Select a Content Item from the Content list and go to the Edit Content page, or
Mouse over a Content Item from the Content list, the three links below it:
Select Edit link goes to the Edit Content page which has the same result as 1. above.
Select the Quick Edit link to pop up the Edit box to easily update the name or its status. Click on the Update button to save or Cancel to exit.
Select Trash link moves a screen location to the Trash box. A Content Item cannot be used when it has been trashed.
Deleting a Content Item
Follow 2.c. above, or
In the Edit Content page and in the Publish box, select the Move to Trash link.
Permanently Deleting a Content Item or Restoring a Content Item
A deleted Content Item can be restored from the Trash box or deleted permanently from the portal. Select the Trash link from the Content list.
On the trash Content list, mouse over the one and select the Restore link to move it back to the All box.
On the trash Content list, mouse over the one or check all by clicking on the checkbox next to Title, select Delete Permanently link to delete these Content Items permanently from the portal; or
On the trash Content list, check all by clicking on the checkbox next to Title, then select Restore or Delete Permanently on the Bulk Actions dropdown box and click on the Apply button. Bulk action does not prompt with a confirmation box or a warning message.
Content Items – Bulk Edit Functionality
The purpose of the Bulk Edit function is to update multiple Content Items in one shot, similar to the status update or move to trash functions.
Search or filter for a group of Content Items, or go to any of the All, Published, Draft, Pending, or Trash boxes by selecting the link on the top.
Check all by clicking on the checkbox next to the Title, or click on the checkbox next to a screen location individually, or multi-select by holding the Ctrl button on the keyboard and clicking on the checkbox next to a Content Item
To update the status of the list:
Click on the Bulk Actions dropdown box, select Edit and click on the Apply button.
A pull-down shows two columns, the left column is the list for bulk editing and the right column is the status dropdown box.
On the left column, click on the cross next to a Content Item to take it out of the list before bulk editing.
On the right column, select an action from the Status dropdown box.
Click on the Update button to save or Cancel to exit.
To delete the list:
Click on the Bulk Actions dropdown box, select Move to Trash, and click on the Apply button. This moves the list to the Trash box.
To restore or delete permanently from the Trash box, please see 4. in the Permanently Deleting or Restoring a Content Item section above.
Screen Locations represent an actual display screen. It has a width and height, in pixels. Each screen has a list of content slides being played, assembled from the playlists associated with the screen location, or via associations with hubs.
The screen location to hub association can be assigned in this menu, or via the hub menu. The association will be reflected in both menus. The same ease of use applies to associating screen locations to playlists.
Using the Screen Locations Menu
Select Screen Locations from the navigation menu.
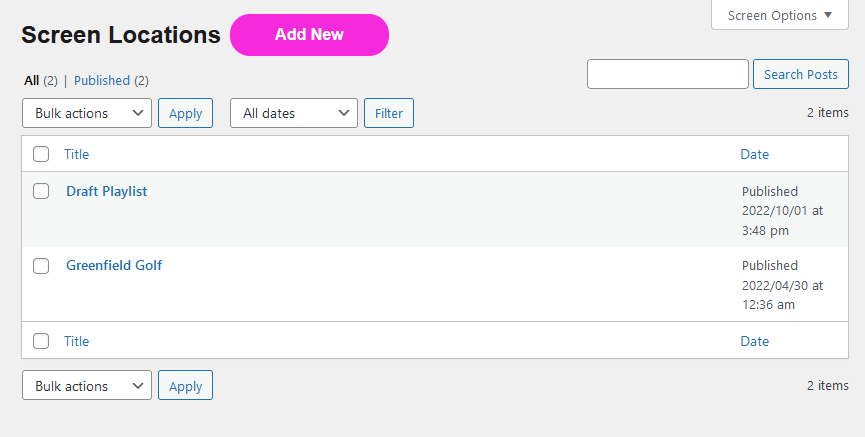
The screen locations list is sorted by create date and in descending order.
To sort by Title or by Date in ascending or descending order:
Mouse over the Title field, click the upward arrow to sort in ascending order and click the downward arrow to sort in descending order.
Mouse over the Date field, click the upward arrow to sort in ascending order and click the downward arrow to sort in descending order.
Creating a New Screen Location
Click on the Add New button next to the title Screen Locations.
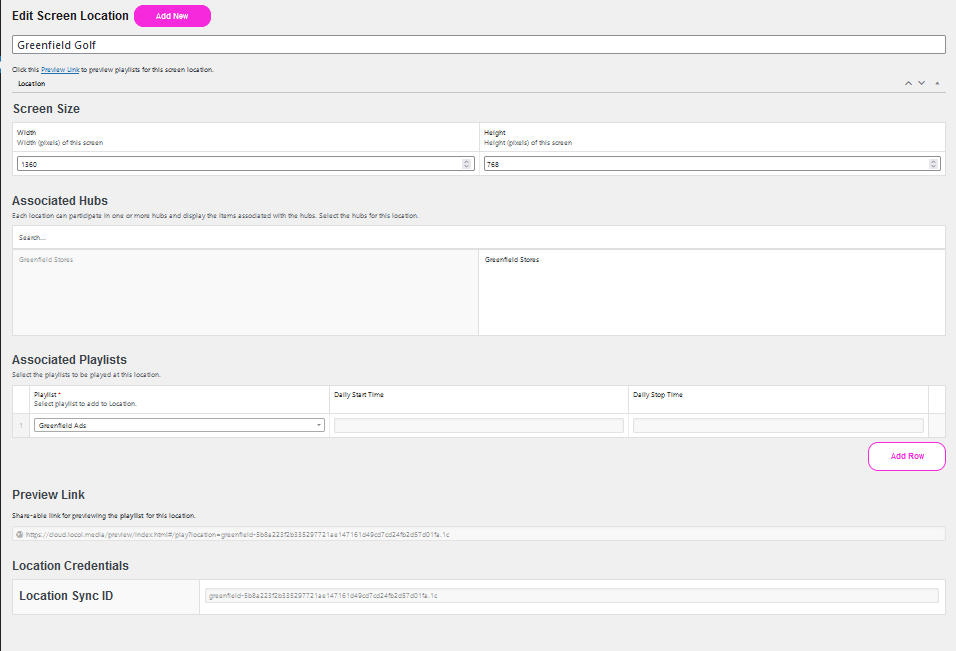
On Add New Screen Location page, key in a name in the Enter Name of Screen Location field.
Screen Size – Defining the size of the screen
Define the size of the screen so for the preview function and the player agent.
The default size is Full HD at 1920 pixels in width and 1080 pixels in height. The left column is the width and the right column is the height.
To change the width, click the up arrow to increase pixels from 1920 and the down arrow to decrease pixels from 1920.
To change the height, click the up arrow to increase pixels from 1080 and the down arrow to decrease pixels from 1080.
Organizing multiple Screen Locations
Each Screen Location can play one or more Playlists.
Hubs are used to share common playlists across Screen Locations.
Each Screen Location can belong to one or more Hubs, the slides played at the Screen Location is the totality of all the slides in all the Playlists associated with the Screen Location, and all the slides in all the Playlists associated with all the Hubs that the Screen Location is associated with.
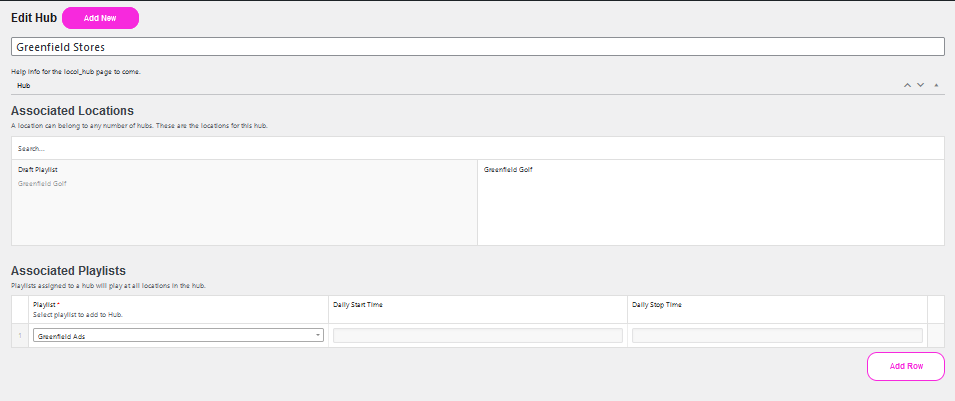
Associated Hubs – Associating/Disassociating Screen Locations and Hubs
There are two columns in the Associated Hubs display. The left column has all available hubs created in the Hubs menu. If it is empty, create a new hub first.
The right column has all the Hubs associated with this Screen Location. A Screen Location can have one or more hubs associated with it.
If a hub is already associated with this Screen Location via the Hubs menu, it is displayed here in the right column. The association can be updated here. Any updates made here will also be reflected in the Hubs menu.
To associate a hub, do a wildcard search in the Search field if necessary. Select the desired hub on the left column and it will be moved to the right column.
To disassociate the relationship, select the desired hub on the right column and click on the minus button next to it.
Associated Playlists – Associating/Disassociating Screen Locations and Playlists
There are three columns in Associated Playlists. On the Playlist column, if the dropdown box is empty after clicking on the Add Row button, create a new playlist in the Playlists menu first.
Daily Start Time and Daily Stop Time are read-only fields for information only from the Playlists menu. Daily Start Time and Daily Stop Time can be set in the Playlists menu.
A playlist associated with a screen location via a hub relationship does not show up in Associated Playlists. Only Playlists directly associated with this screen location show up here.
To associate a playlist to this screen location, click on the Add Row button:
On the playlist column, click the down arrow to pull down a list of available playlists. Click on the desired one to select.
To change the daily start time and daily stop time, go to the Playlists menu to update.
To disassociate:
There are two buttons on the right side next to a playlist, the + button and the – button.
The + button is Add Row which has the same result as clicking on the Add Row button.
The – button is Remove Row which is to disassociate the playlist from the hub. A confirmation box pops up before removal, select Remove to disassociate or Cancel to exit.
Preview Link – Previewing the Playlists for a Screen Location
A Screen Location must be Published before being previewed.
Click on the Preview Link at the top of the page.
A Preview Link is available for sharing.
Saving a Screen Location
A screen location can only be used in production when it is Published.
To save work before it is ready for production, use Draft mode.
The Save Draft button and Publish button are changed to the Update button for a saved Screen Location. Click the Update button to save your changes.
Click on the Save Draft button to save the Screen Location in draft mode. To change the status from draft to published, simply click on the Publish button. To change the status from draft to pending review, click the Edit link next to it, select Pending Review from the dropdown box and click on the OK button to save, or Cancel to exit.
Click on the Publish button to publish the Screen Location for use. The published date and time are shown. To change the status from published to pending review or draft, click the Edit link next to it, select Pending Review or Draft from the dropdown box and click on the OK button to save, or Cancel to exit.
Visibility is set as Public by default. A Screen Location needs to be public to be used. Click the Edit link next to it, select Password Protected or Private, and click on the OK button to save, or Cancel to exit.
Searching for Screen Locations
There are several ways to search or filter a screen location list
Screen Locations are grouped by All, Published, Draft, Pending, and Trash boxes. Each box has a count next to it.
Wildcard search – key in some keywords in the field below the profile pic and click on the Search Posts button.
Filtered by create date – click on the All Dates dropdown box, select month and year, and click on the Filter button.
Editing a Screen Location
Select a screen location from the Screen Locations list and go to the Edit Screen Location page, or
Mouse over a screen location from the Screen Locations list, the three links below it:
Select Edit link goes to the Edit Screen Location page which has the same result as 1. above.
Select the Quick Edit link to pop up the Edit box to easily update the name or its status. Click on the Update button to save or Cancel to exit.
Select Trash link moves a screen location to the Trash box. A screen location cannot be used when it has been trashed.
Deleting a Screen Location
Follow 2.c. above, or
In the Edit Screen Location page and in the Publish box, select the Move to Trash link.
Permanently Deleting a Screen Location or Restoring a Screen Location
A deleted Screen Location can be restored from the Trash box or deleted permanently from the portal. Select the Trash link from the Screen Locations list.
On the trash Screen Location list, mouse over the one and select the Restore link to move it back to the All box.
On the trash Screen Location list, mouse over the one or check all by clicking on the checkbox next to Title, select Delete Permanently link to delete these Screen Locations permanently from the portal; or
On the trash Screen Location list, check all by clicking on the checkbox next to Title, then select Restore or Delete Permanently on the Bulk Actions dropdown box and click on the Apply button. Bulk action does not prompt with a confirmation box or a warning message.
Screen Locations – Bulk Edit Functionality
The purpose of the Bulk Edit function is to update multiple screen locations in one shot, similar to the status update or move to trash functions.
Search or filter for a group of screen locations, or go to any of the All, Published, Draft, Pending, or Trash boxes by selecting the link on the top.
Check all by clicking on the checkbox next to Title, or click on the checkbox next to a screen location individually, or multi-select by holding the Ctrl button on the keyboard and clicking on the checkbox next to a screen location
To update the status of the list:
Click on the Bulk Actions dropdown box, select Edit and click on the Apply button.
A pull-down shows two columns, the left column is the list for bulk editing and the right column is the status dropdown box.
On the left column, click on the cross next to a screen location to take it out from the list before bulk editing.
On the right column, select an action from the Status dropdown box.
Click on the Update button to save or Cancel to exit.
To delete the list:
Click on the Bulk Actions dropdown box, select Move to Trash, and click on the Apply button. This moves the list to the Trash box.
To restore or delete permanently from the Trash box, please see 4. in the Permanently Deleting or Restoring a Screen Location section above.
Hubs are used to organize playlists for sharing among Screen Locations. Playlists that are associated with a hub will be part of the content for any screen locations associated with the hub. A screen location can be associated with zero or any number of hubs, so hubs can be created for specialized groups or for organizing screen locations into regional hubs, etc.
Using the Hubs Menu
Select Hubs from the navigation menu.
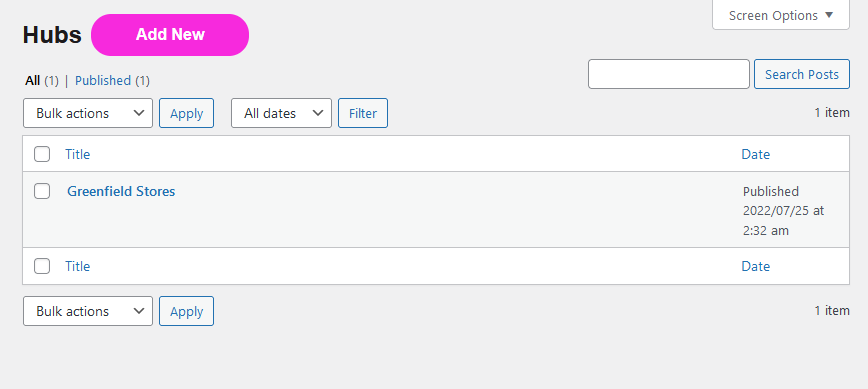
The hubs list is sorted by create date and is in descending order.
To sort by Title or by Date in ascending or descending order:
Mouse over the Title field, click the upward arrow to sort in ascending order, and click the downward arrow to sort in descending order.
Mouse over the Date field, click the upward arrow to sort in ascending order, and click the downward arrow to sort in descending order.
Creating a New Hub
Click on the Add New button next to the title Hubs.
On Add New Hub page, key in a name in the Enter Name of Hub field.
Organizing multiple Hubs
Each Hub can be associated with one or more Screen Locations.
Each Hub can be associated with one or more Playlists.
Each Screen Location can belong to one or more Hubs, the slides played at the Screen Location is the totality of all the slides in all the Playlists associated with the Screen Location, and all the slides in all the Playlists associated with all the Hubs that the Screen Location is associated with.
Associated Locations – Associating/Disassociating Hubs and Screen Locations
There are two columns in the Associated Locations display. The left column has all available screen locations that have been created in the Screen Locations menu. If it is empty, create a new screen location first.
The right column has the Screen Locations associated with this Hub. A Hub can have one or more screen locations associated with it.
A screen location can be associated with a hub via the Screen Locations menu. The association will show in the right column. That association can be updated here. Any updates made also be reflected in the Screen Locations menu.
To associate a screen location, do a wildcard search in the Search field if necessary. Select the desired screen location on the left column and it will be moved to the right column.
To disassociate the relationship, select the desired screen location on the right column and click on the minus button next to it.
Associated Playlists – Associating/Disassociating Hubs and Playlists
There are three columns in Associated Playlists. On the Playlist column, if the dropdown box is empty after clicking on the Add Row button, create a new playlist in the Playlists menu first.
Daily Start Time and Daily Stop Time are read-only fields for information only from the Playlists menu. Daily Start Time and Daily Stop Time can be set in the Playlists menu.
Playlists associated with this hub show up here. These associated playlists are shared by all screen locations associated with this hub.
To associate a playlist to this hub, click on the Add Row button:
On the playlist column, click the down arrow to pull down a list of available playlists. Click on the desired one to select.
To change the daily start time and daily stop time, go to the Playlists menu to update.
To disassociate:
There are two buttons on the right side next to a playlist, the + button and the – button.
The + button is Add Row which has the same result as clicking on the Add Row button.
The – button is Remove Row which is to disassociate the playlist from the hub. A confirmation box pops up before removal, select Remove to disassociate or Cancel to exit.
Saving a Hub
A hub can only be used in production when it is Published.
To save work before it is ready for production, use Draft mode.
The Save Draft button and Publish button are changed to the Update button for a saved hub. Click the Update button to save your changes.
Click on the Save Draft button to save the hub in draft mode. To change the status from draft to published, simply click on the Publish button. To change the status from draft to pending review, click the Edit link next to it, select Pending Review from the dropdown box and click on the OK button to save, or Cancel to exit.
Click on the Publish button to publish the Hub for use. The published date and time are shown. To change the status from published to pending review or draft, click the Edit link next to it, select Pending Review or Draft from the dropdown box and click on the OK button to save, or Cancel to exit.
Visibility is set as Public by default. A Hub needs to be public to be used. Click the Edit link next to it, select Password Protected or Private, and click on the OK button to save, or Cancel to exit.
Searching for Hubs
There are several ways to search or filter a hub list
Hubs are grouped by All, Published, Draft, Pending, and Trash boxes. Each box has a count next to it.
Wildcard search – key in some keywords in the field below the profile pic and click on the Search Posts button.
Filtered by create date – click on the All Dates dropdown box, select month and year, and click on the Filter button.
Editing a Hub
Select a hub from the Hubs list and go to the Edit Hub page, or
Mouse over a hub from the Hubs list, the three links below it:
Select Edit link goes to the Edit Hub page which has the same result as 1. above.
Select the Quick Edit link to pop up the Edit box to easily update the name or its status. Click on the Update button to save or Cancel to exit.
Select Trash link moves a hub to the Trash box. A Hub cannot be used when it has been trashed.
Deleting a Hub
Follow 2.c. above, or
In the Edit Hub page and in the Publish box, select the Move to Trash link.
Permanently Deleting a Hub or Restoring a Hub
A deleted hub can be restored from the Trash box or deleted permanently from the portal. Select the Trash link from the Hubs list.
On the trash hub list, mouse over the one and select the Restore link to move it back to the All box.
On the trash hub list, mouse over the one or check all by clicking on the checkbox next to Title, select Delete Permanently link to delete these hubs permanently from the portal; or
On the trash hub list, check all by clicking on the checkbox next to Title, then select Restore or Delete Permanently on the Bulk Actions dropdown box and click on the Apply button. Bulk action does not prompt with a confirmation box or a warning message.
Hubs – Bulk Edit Functionality
The purpose of the Bulk Edit function is to update multiple hubs in one shot, similar to the status update or move to trash functions.
Search or filter for a group of hubs, or go to any of the All, Published, Draft, Pending, or Trash boxes by selecting the link on the top.
Check all by clicking on the checkbox next to Title, or click on the checkbox next to a hub individually, or multi-select by holding the Ctrl button on the keyboard and clicking on the checkbox next to a hub.
To update the status of the list:
Click on the Bulk Actions dropdown box, select Edit and click on the Apply button.
A pull-down shows two columns, the left column is the list for bulk editing and the right column is the status dropdown box.
On the left column, click on the cross next to a hub to take it out from the list before bulk editing.
On the right column, select an action from the Status dropdown box.
Click on the Update button to save or Cancel to exit.
To delete the list:
Click on the Bulk Actions dropdown box, select Move to Trash, and click on the Apply button. This moves the list to the Trash box.
To restore or delete permanently from the Trash box, please see 4. in the Permanently Deleting or Restoring a Hub section above.
Playlists are used to organize content slides into meaningful groups. Playlists can be created here so that slides created on the portal (in the Content Menu) or on your website (via the Locol plugin) can be assigned to playlists.
Playlists that are associated with a particular Screen Location will be played on that screen location, subject to the scheduling of the Playlist.
Playlists that are associated with a particular Hub will be played on all screen locations associated with that hub, again subject to the scheduling of the Playlist.
Using the Playlists Menu
Select Playlists from the navigation menu.
The screen locations list is sorted by create date and in descending order.
To sort by Title or by Date in ascending or descending order:
Mouse over the Title field, click the upward arrow to sort in ascending order, and click the downward arrow to sort in descending order.
Mouse over the Date field, click the upward arrow to sort in ascending order, and click the downward arrow to sort in descending order.
Creating a New Playlist
Click on the Add New button next to the title Playlists.
On Add New Playlist page, key in a name in the Enter Name of Playlist field.
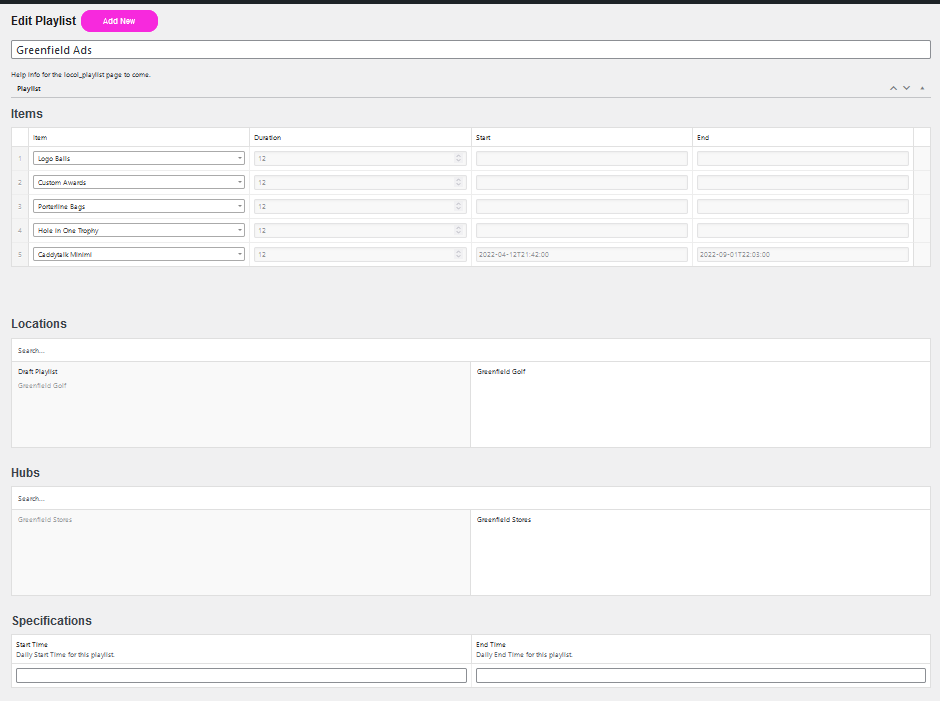
Items – Adding Content to a Playlist
Items are added to a playlist in the Content menu. Please see Using the Content menuon how to create or update an item for a playlist.
Associated Locations – Associating/Disassociating Playlists and Screen Locations
There are two columns in the Screen Locations display. The left column has all available screen locations created in the Screen Locations menu. If it is empty, create a new screen location first.
The right column has all the Screen Locations associated with this Playlist. A Playlist can have one or more Screen Locations associated with it.
If a Screen Location is already associated with this Playlist via the Screen Locations menu, it is displayed here in the right column. The association can be updated here. Any updates made here will also be reflected in the Screen Locations menu.
To associate a Screen Location, do a wildcard search in the Search field if necessary. Select the desired Screen Location on the left column and it will be moved to the right column.
To disassociate the relationship, select the desired Screen Location on the right column and click on the minus button next to it.
Associated Hubs – Associating/Disassociating Playlists and Hubs
There are two columns in the Hubs display. The left column has all available screen locations created in the Hubs menu. If it is empty, create a new hub first.
The right column has all the Hubs associated with this Playlist. A Playlist can have one or more Hubs associated with it.
If a Hub is already associated with this Playlist via the Hubs menu, it is displayed here in the right column. The association can be updated here. Any updates made here will also be reflected in the Hubs menu.
To associate a Hub, do a wildcard search in the Search field if necessary. Select the desired Hub on the left column and it will be moved to the right column.
To disassociate the relationship, select the desired Hub on the right column and click on the minus button next to it.
Specifications – Set Start Time and End Time to start and stop a Playlist
The Start Time is when a playlist starts playing during the day and the End Time is when it stops playing. If both times are blank, the playlist plays around the clock. If there is a Start Time but no End Time, the playlist plays continuously. If there is no Start Time but an End Time, the playlist is not going to start.
The system uses the UTC time zone. There are two columns in Specifications: Start Time and End Time. For Start Time
Click on the Start Time field
The Choose Time box pops up
Click Now to select the current time, or click on the hour field pulls down a 12-hours in am/pm and the minute field pulls down 60 minutes in the hour
To clear a Start Time, highlight the field and hit the Delete button on the keyboard
For End Time
Click on the End Time field
The Choose Time box pops up
Click Now to select the current time, or click on the hour field pulls down a 12-hours in am/pm and the minute field pulls down 60 minutes in the hour
To clear an end time, highlight the field and hit the Delete button on the keyboard
Saving a Playlist
A Playlist can only be used in production when it is Published.
To save work before it is ready for production, use Draft mode.
The Save Draft button and Publish button are changed to the Update button for a saved playlist. Click the Update button to save your changes.
Click on the Save Draft button to save the playlist in draft mode. To change the status from draft to published, simply click on the Publish button. To change the status from draft to pending review, click the Edit link next to it, select Pending Review from the dropdown box and click on the OK button to save, or Cancel to exit.
Click on the Publish button to publish the Playlist for use. The published date and time are shown. To change the status from published to pending review or draft, click the Edit link next to it, select Pending Review or Draft from the dropdown box and click on the OK button to save, or Cancel to exit.
Visibility is set as Public by default. A Playlist needs to be public to be used. Click the Edit link next to it, select Password Protected or Private, and click on the OK button to save, or Cancel to exit.
Searching for Playlists
There are several ways to search or filter a playlist list
Playlists are grouped by All, Published, Draft, Pending, and Trash boxes. Each box has a count next to it.
Wildcard search – key in some keywords in the field below the profile pic and click on the Search Posts button.
Filtered by create date – click on the All Dates dropdown box, select month and year, and click on the Filter button.
Editing a Playlist
Select a screen location from the Playlists list and go to the Edit Playlist page, or
Mouse over a playlist from the Playlists list, the three links below it:
Select Edit link goes to the Edit Playlist page which has the same result as 1. above.
Select the Quick Edit link to pop up the Edit box to easily update the name or its status. Click on the Update button to save or Cancel to exit.
Select Trash link moves a screen location to the Trash box. A playlist cannot be used when it has been trashed.
Deleting a Playlist
Follow 2.c. above, or
In the Edit Playlist page and in the Publish box, select the Move to Trash link.
Permanently Deleting a Playlist or Restoring a Playlist
A deleted Playlist can be restored from the Trash box or deleted permanently from the portal. Select the Trash link from the Playlists list.
On the trash Playlist list, mouse over the one and select the Restore link to move it back to the All box.
On the trash Playlist list, mouse over the one or check all by clicking on the checkbox next to Title, select Delete Permanently link to delete these Playlists permanently from the portal; or
On the trash Playlist list, check all by clicking on the checkbox next to Title, then select Restore or Delete Permanently on the Bulk Actions dropdown box and click on the Apply button. Bulk action does not prompt with a confirmation box or a warning message.
Playlists – Bulk Edit Functionality
The purpose of the Bulk Edit function is to update multiple playlists in one shot, similar to the status update or move to trash functions.
Search or filter for a group of playlists, or go to any of the All, Published, Draft, Pending, or Trash boxes by selecting the link on the top.
Check all by clicking on the checkbox next to Title, or click on the checkbox next to a playlist individually, or multi-select by holding the Ctrl button on the keyboard and clicking on the checkbox next to a playlist
To update the status of the list:
Click on the Bulk Actions dropdown box, select Edit and click on the Apply button.
A pull-down shows two columns, the left column is the list for bulk editing and the right column is the status dropdown box.
On the left column, click on the cross next to a playlist to take it out of the list before bulk editing.
On the right column, select an action from the Status dropdown box.
Click on the Update button to save or Cancel to exit.
To delete the list:
Click on the Bulk Actions dropdown box, select Move to Trash, and click on the Apply button. This moves the list to the Trash box.
To restore or delete permanently from the Trash box, please see 4. in the Permanently Deleting or Restoring a Playlist section above.
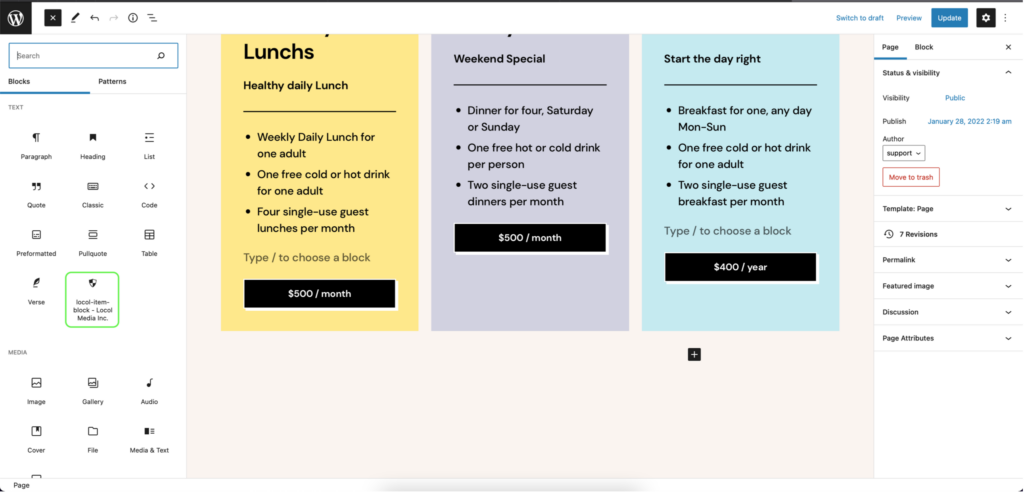
In this tutorial, we will use the WP Columns block to lay out a sign with two column of images a vertical separator. Applying best practices along the steps.
The Plan
Laying out a digital sign is different from laying out a web site page. For a web site page, responsive design is important to adapt to different screen sizes. For a digital sign, it is important to understand how the page would look on that particular screen.
The current version of the block editor by default also only use the center portion of the screen for your layout. Some of the block themes remove this limitation. We have found the Page Editor Full Width plugin https://wordpress.org/plugins/page-editor-full-width/ to be useful.
The strategy to controlling your layout for a digital sign is to create a single column with the right width (the width of the screen), and do your layout within that single column.
When you use the block editor to lay out your slide, make sure that you set the Create a display page using the block editor in the Locol block. The collapse icon on the top right corner of the block is also handy for minimizing the Locol block.
Step by Step
The following steps use the default WP Columns block to achieve this. The same can be accomplished with column or container blocks from other block themes.
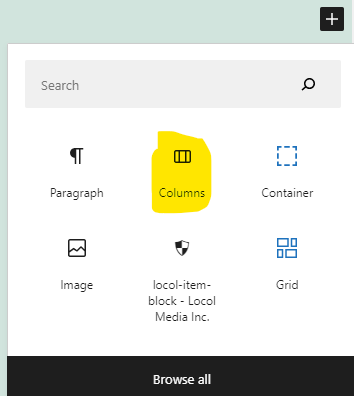
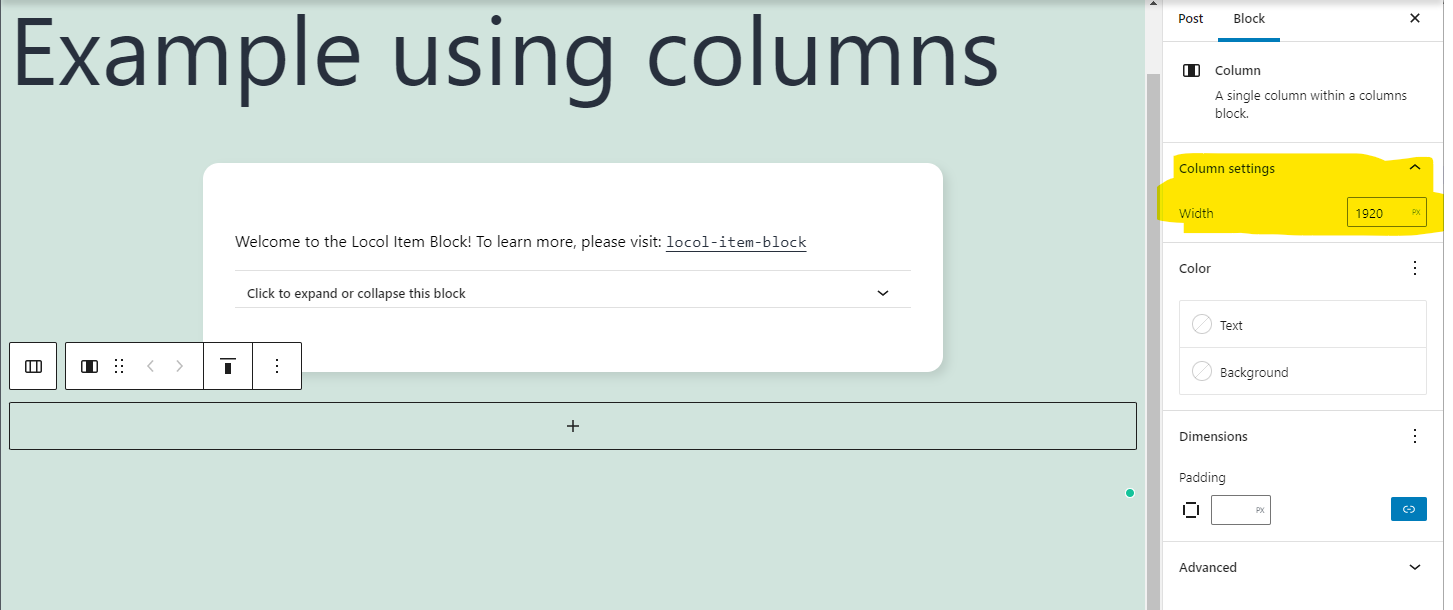
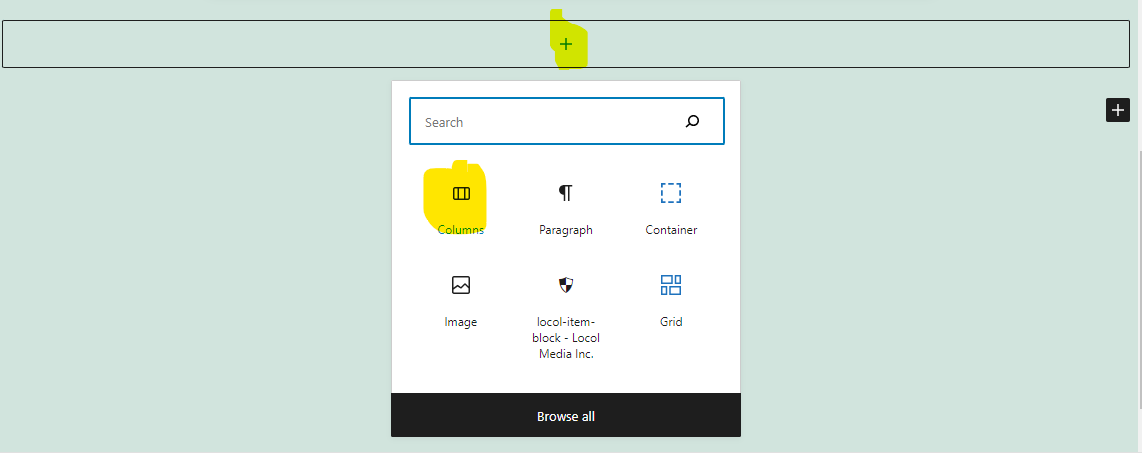
1, Look for the Add block button (black plus icon) beneath the Locol block, click on it and select the Columns block.
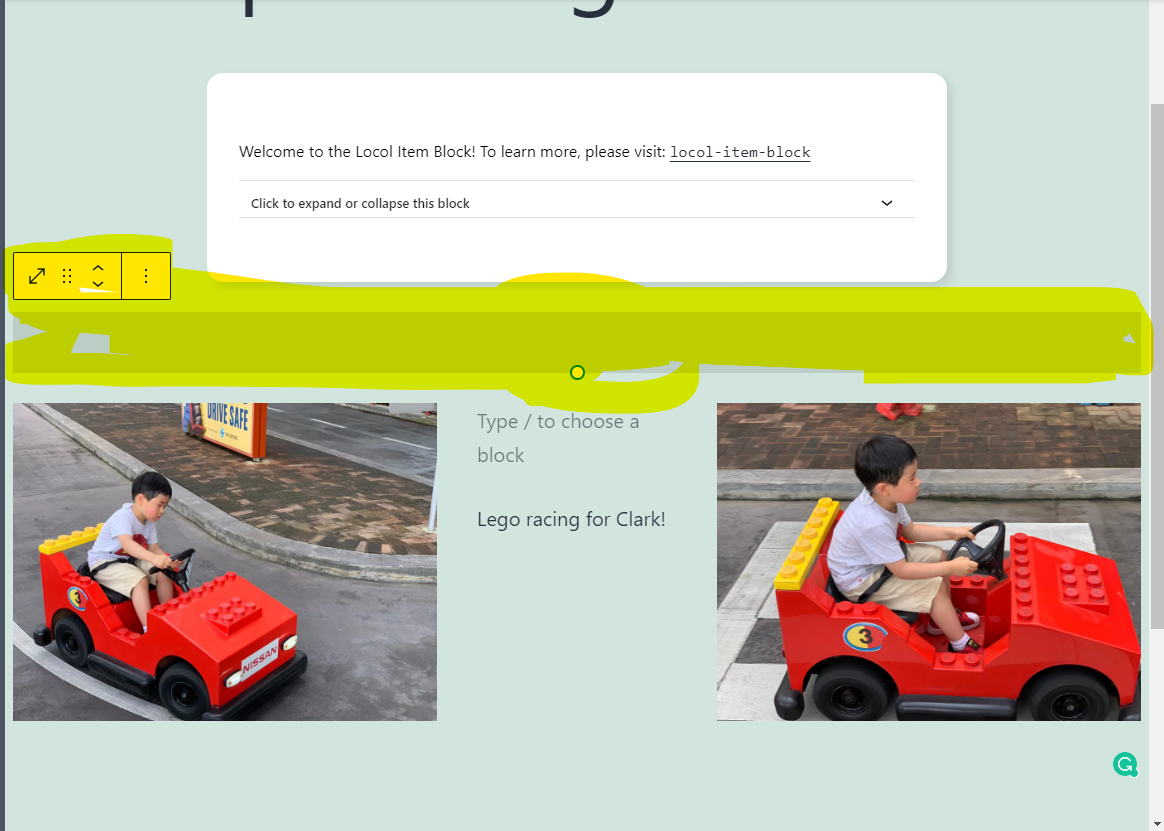
2, Select a single column Columns block and input the size of your digital display in the right hand Block panel. This will create a single column with the right width so that you can layout the sign’s content.
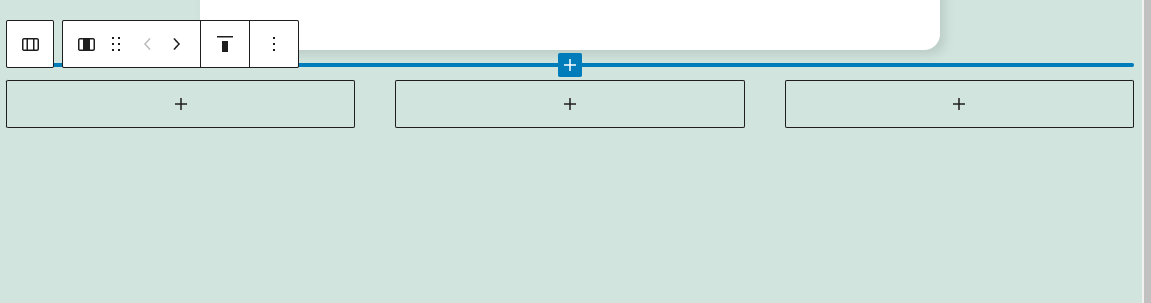
3, In this example, we will use a Columns block within the outer Columns block to create a three panel layout. To do that, simply hit the plus icon within the first block created, and select the Columns block again, specifying three columns this time.
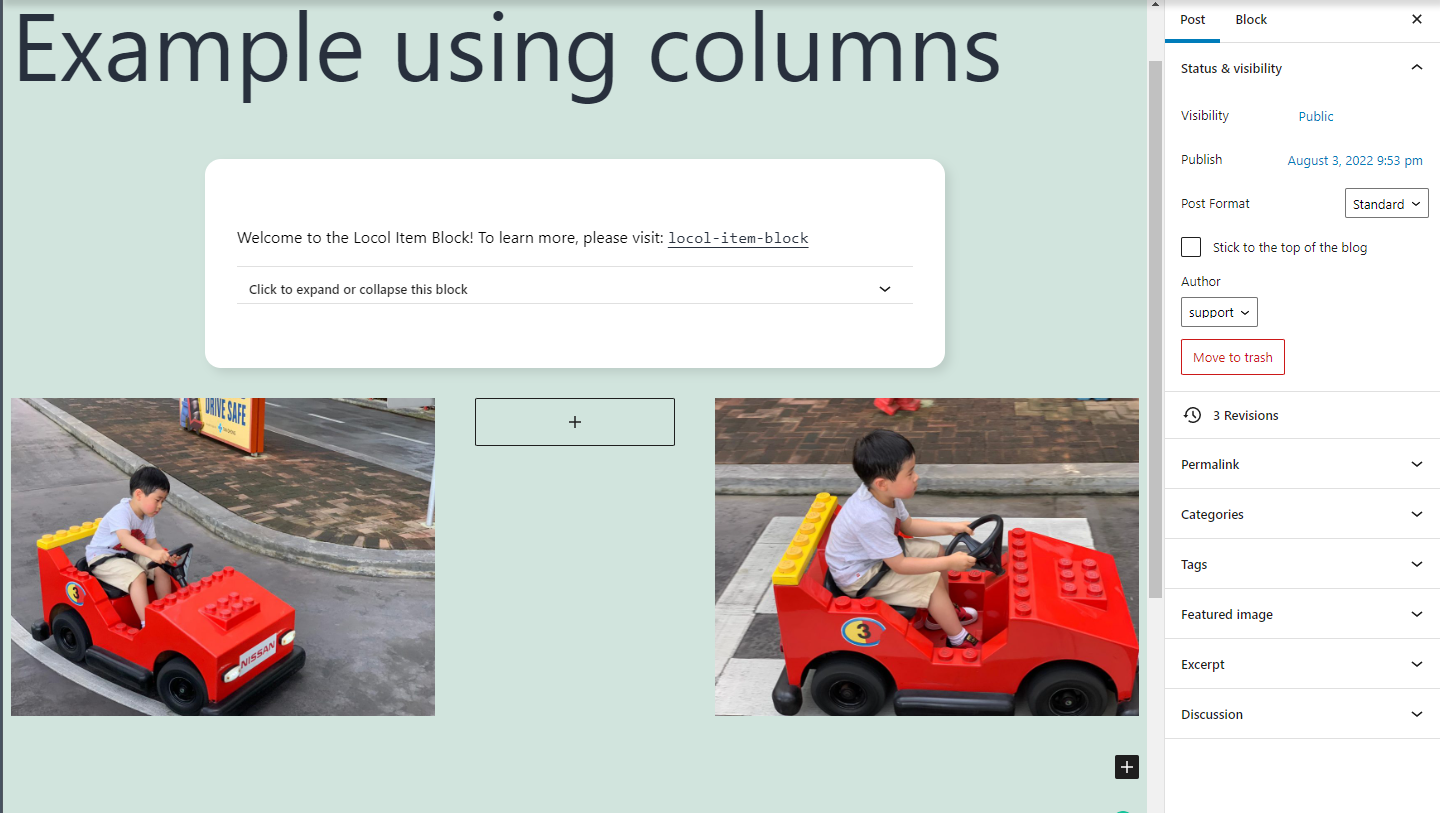
4, We now have a three column block inside the full screen width block.
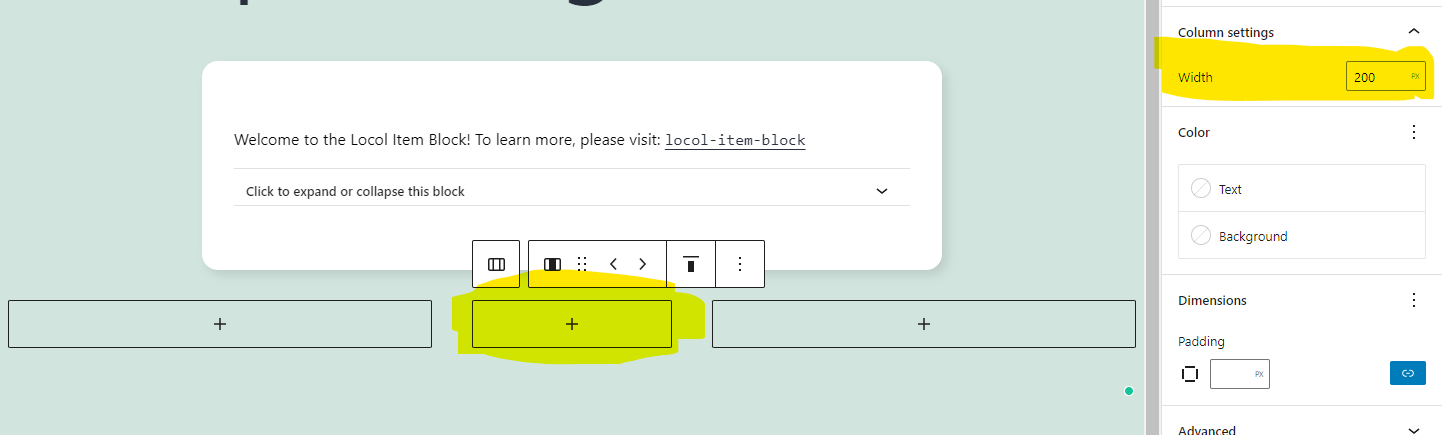
5, We are using the middle column as a vertical separator. It can be blank, or we might put some something simple (like a paragraph) in the middle column. As such, it is a column narrower than the outside two columns.. In this example, we are setting the width of the center column to 200 pixels.
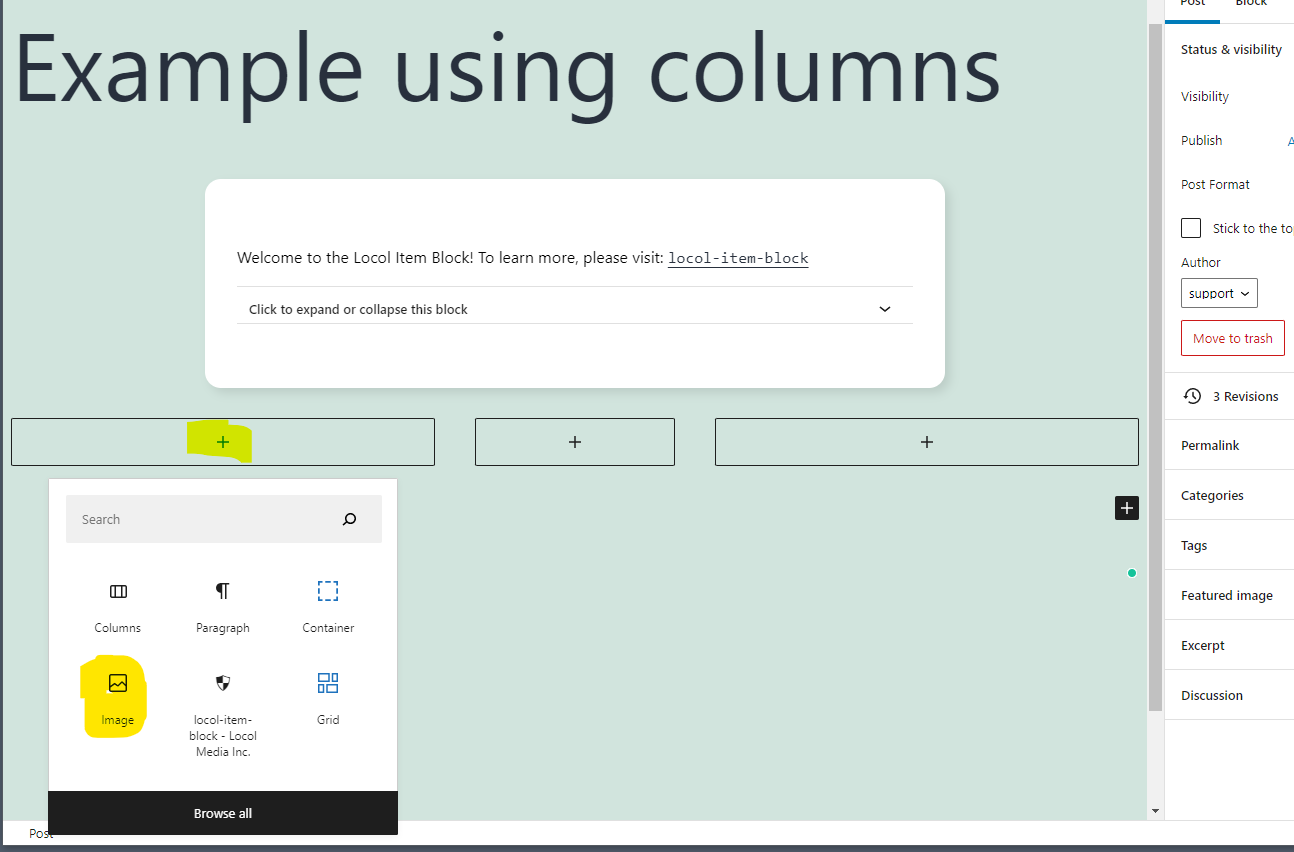
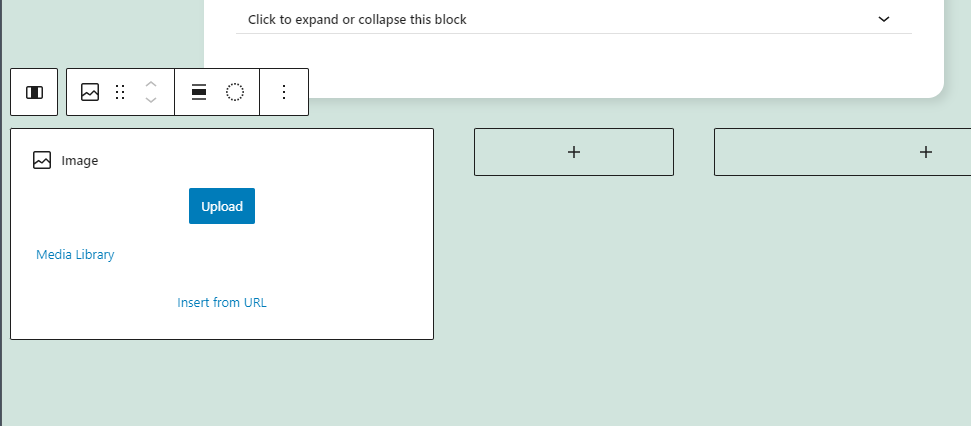
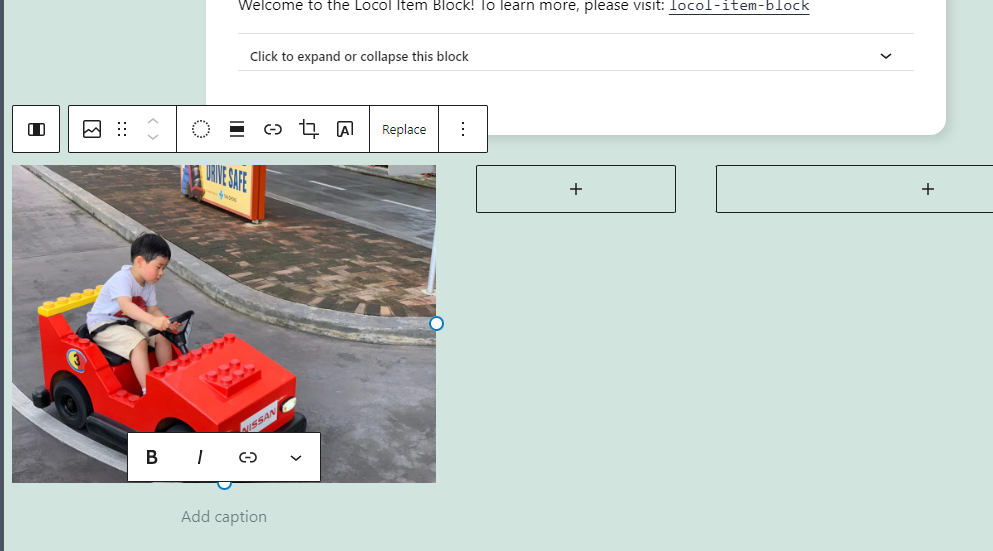
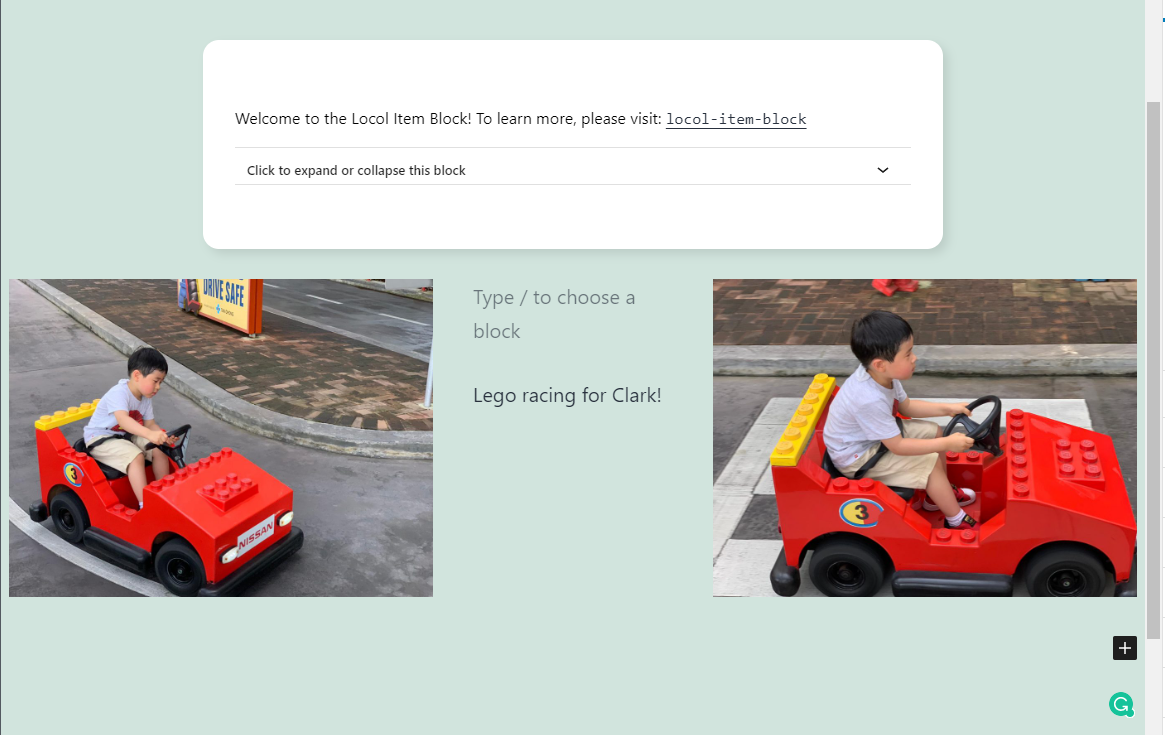
6, Insert an Image block into the left column and upload your image.
7, Do the same for the right hand column.
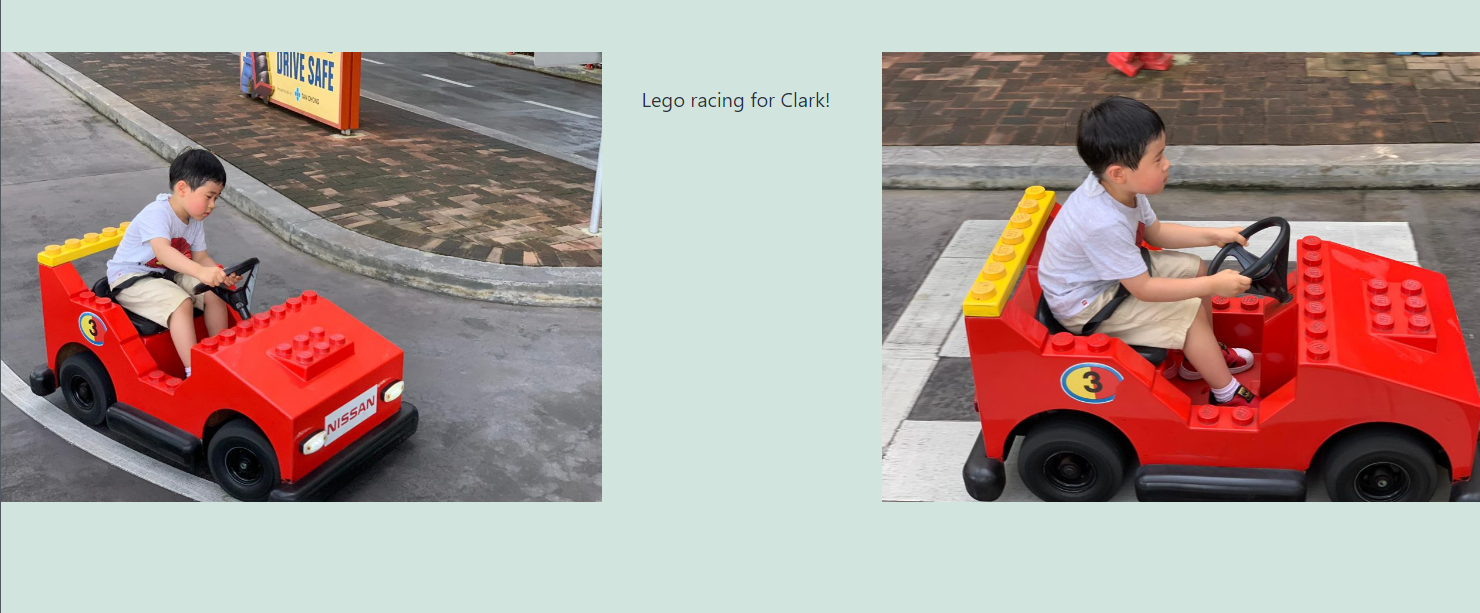
8, We can leave the middle column blank, acting as a pure separator, or we can use it for something. Adding a small line of text into the middle of the two columns.
9, Add a Spacer block to provide better centering of the content.
One of the key features that Locol Media offers is a way to connect your own site with our portal. Doing so offers advantages for your own workflow, and in particular is access to all of your assets when designing both the site and digital signage for your clients.
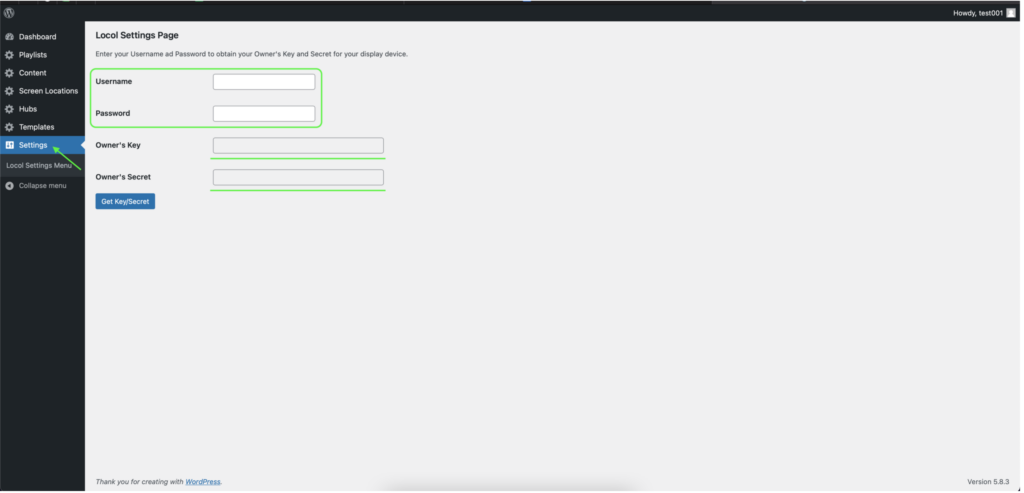
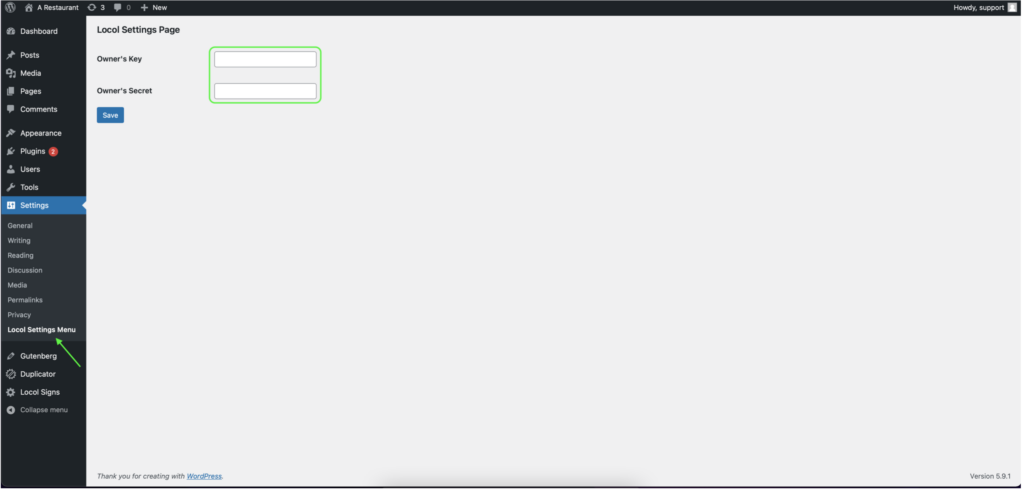
To link the two together, sign into the portal and click on the Settings tab on the left. Enter in your portal’s username and password, then click the Get Key/Secret button. You will instantly receive your Owner’s Key and Owner’s Secret.
After this, log into your WordPress site and click on the Locol Settings tab on the left. Then, enter in the Owner’s Key and Owner’s secret into their respective fields and click on the Save button.
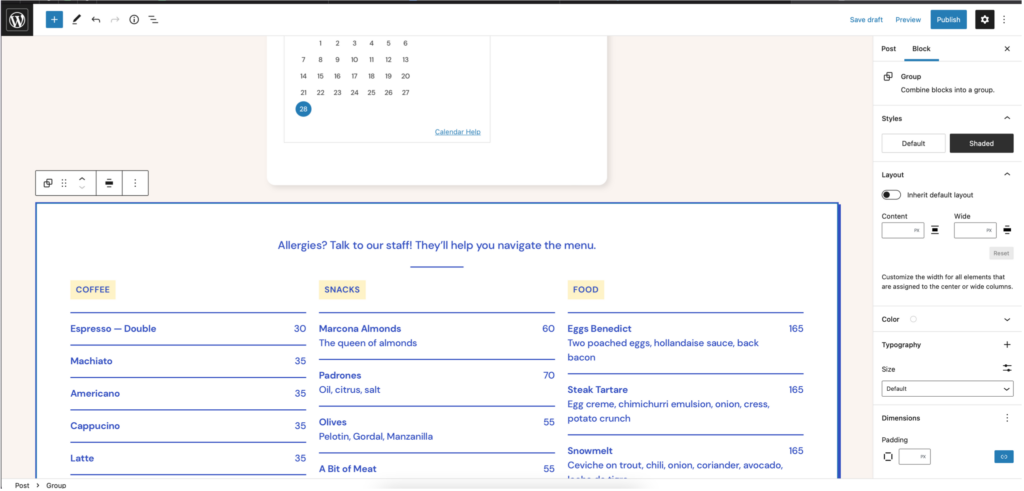
If you just need a specific block from one of your Pages to create a slide for your Playlist, you can easily copy it into a Post just as you would with another Page of your website.
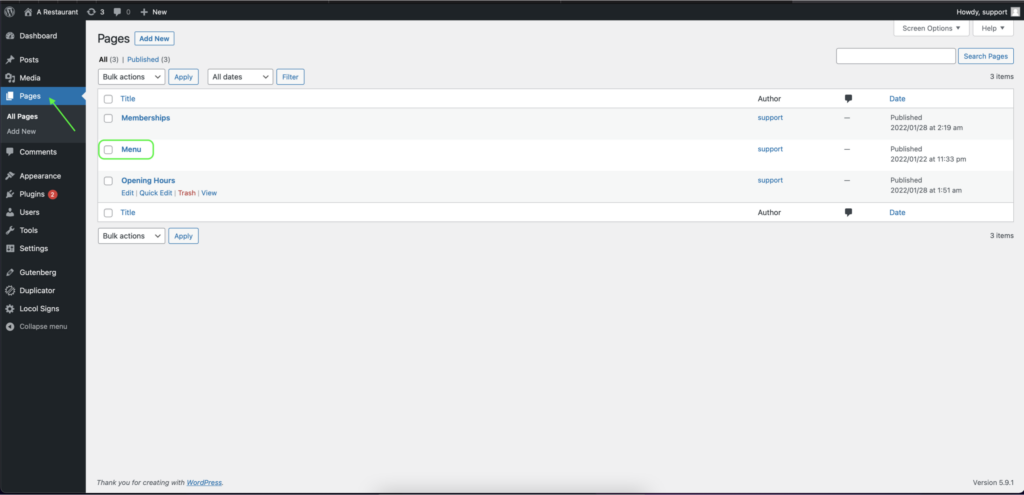
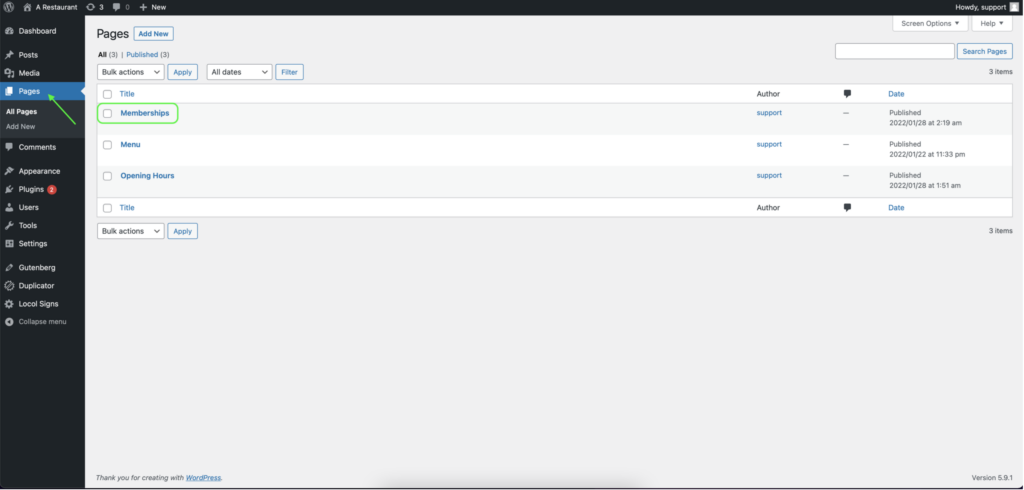
Click on the Pages tab to find the specific page that contains the block you need. In this example, we just need the menu.
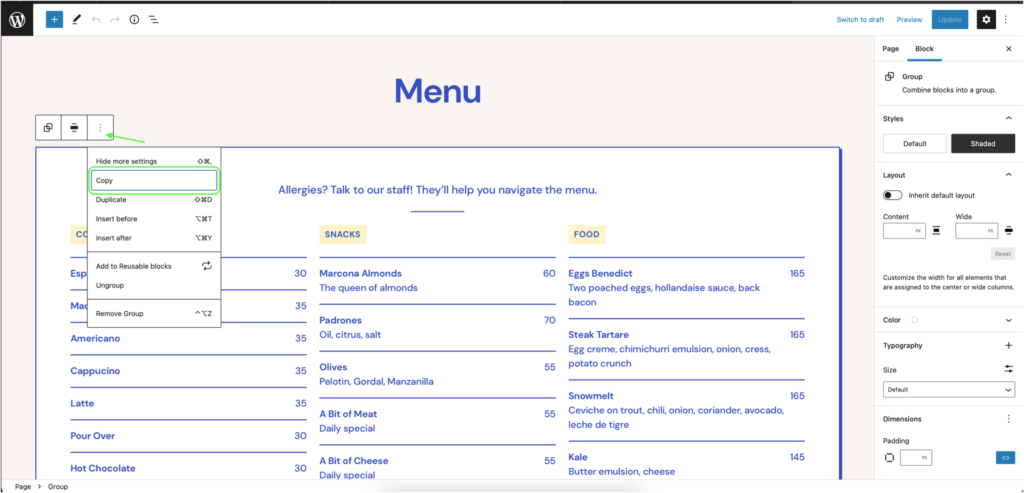
Once you’re in the needed Page, you can select the block you want by clicking on the button with three dots. Click on Copy and exit the page.
Click on the Posts tab on the left, then the Add New button at the top left.
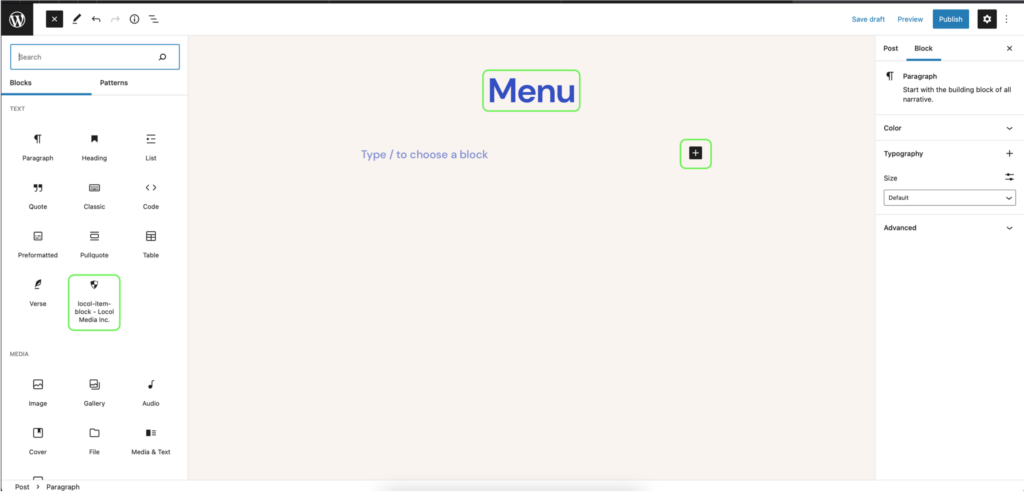
Add a Title to your post, and add the “locol-item-block”.
Completing the above step will bring up a familiar block for creating a slide for your Playlist.
Once you have completed all the fields, simply paste the desired block underneath and Publish as you normally would.
You have now added a new slide to your Playlist, using assets you’ve already created for the website.
One advantage of this feature is that you can further customize the block to best suit the intended display as needed. This preserves the important information you need to keep consistent on the website and the playlist, but also give you the flexibility to adapt each to their respective environments.
An important, time-saving tool that Locol Media offers is the ability to turn entire pages into slides for your digital signs.
Click on the Pages tab on the left to access all the pages you’ve already designed for the client’s website. Once there, click on the relevant page (in our example, Memberships).
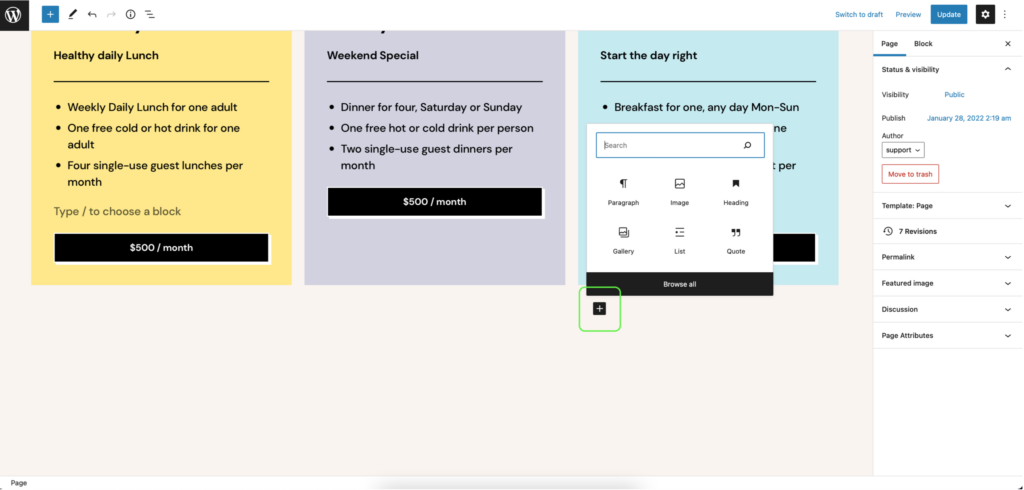
As you can see, the Membership page is already filled with blocks designed for the website. You can add a new block underneath all of your designs to also make it a slide.
If you look at all the blocks available, you will notice the “locol-item-block” selection. Click on that to add it to your page.
Now you will see a familiar block that we have worked with before. Enter in all of your selections, including selecting the Playlist, duration, and other features that have been covered in another guide.
Your page is now also a slide in your chosen Playlist. Keep in mind that it will look exactly as how it does on your website, including any default headers or footers that normally appear there.*
Welcome back! If you haven’t seen our first article that goes over the fundamental tools you have access to, you should check out our Quick Start Guide first. If you prefer to see a video rather than read this article, click here.
This article will go over the Block Editor feature of WordPress and how you can use it to create slides.
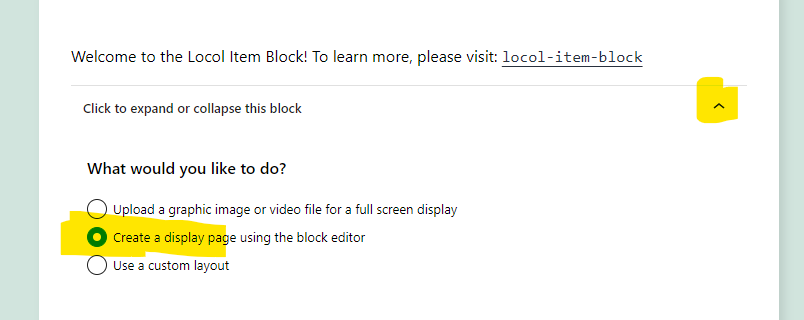
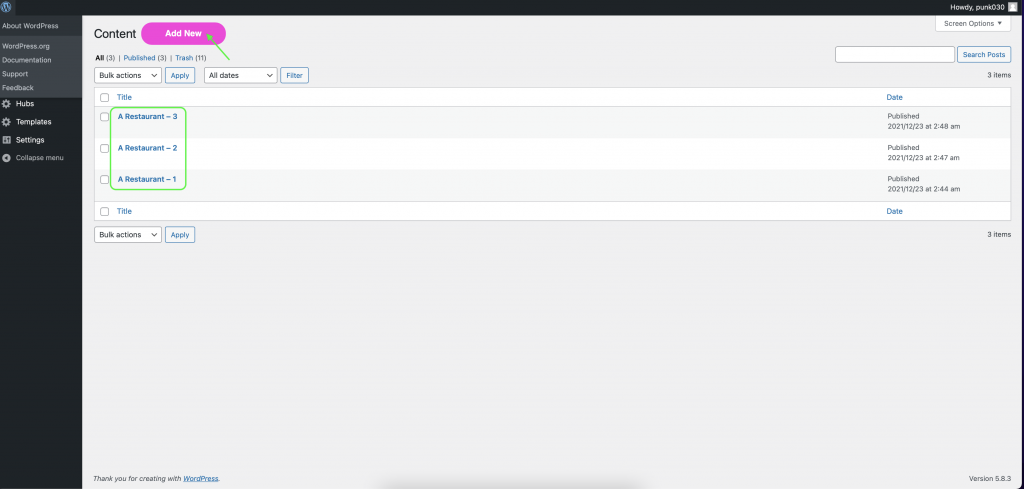
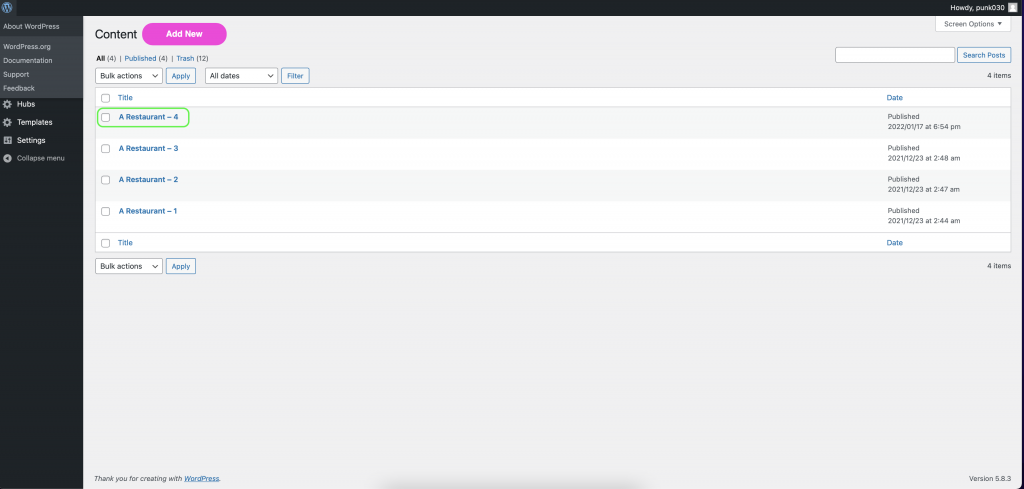
To do this, you will need to return to the Content tab. In the example below, you can see the three slides we created in our last article using pre-made images. Click on the Add New tab to create a fourth one.
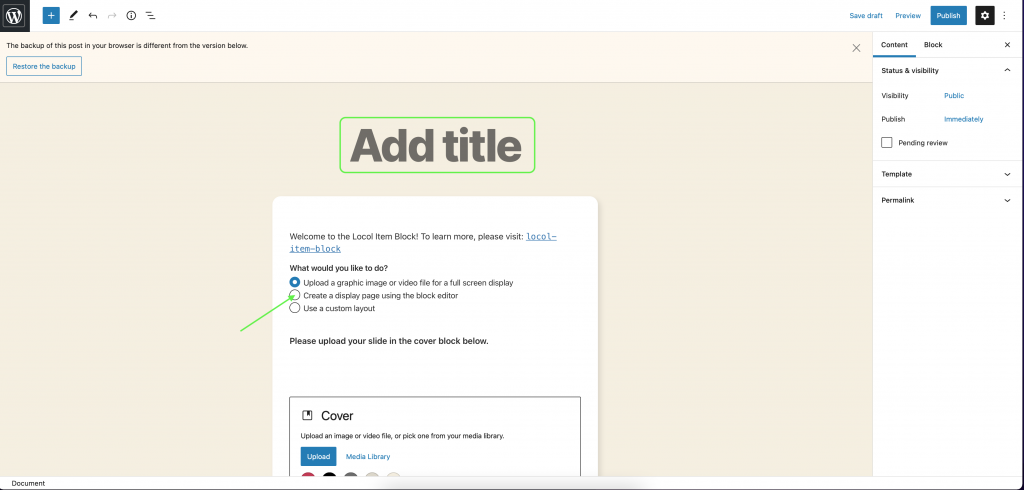
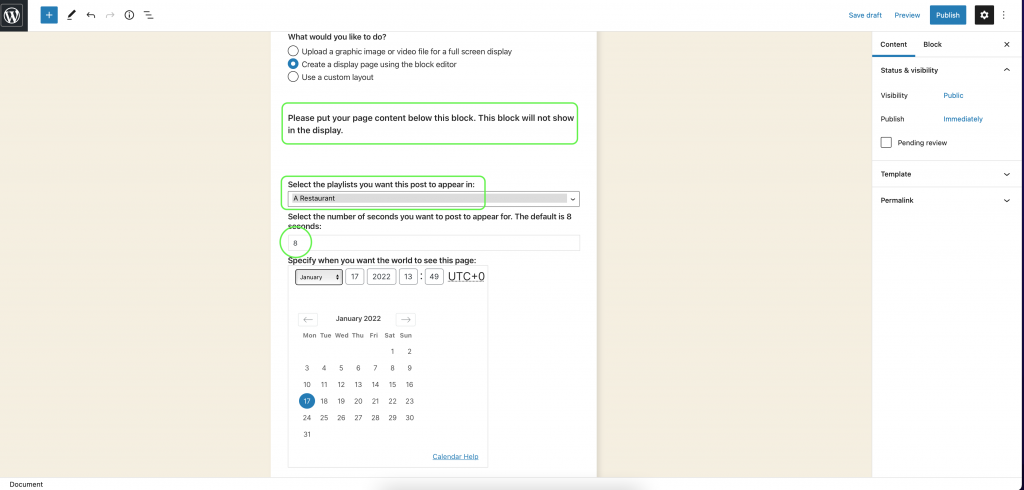
Inside, we can see the familiar Title section. Add your title as before and look at the three choices below. Last time, we chose the first option because we had a pre-made image. This time, choose the second option “Create a display page using the block editor.”
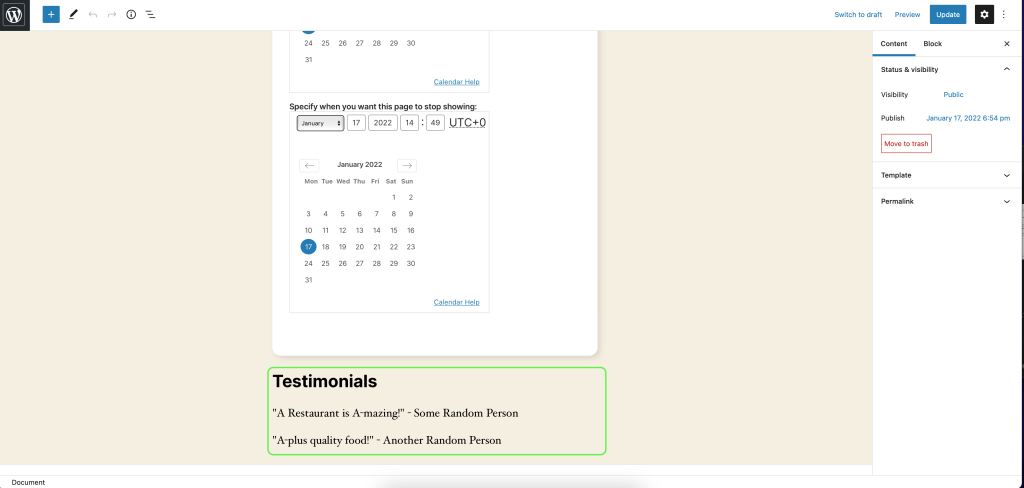
Once you have made your selection, you will see a new set of instructions that directs you to create your page content below the current block. We will do that later; in the meantime there are other sections to make.
Select the playlists that you want this slide to appear in. In our example, we will add this to the playlist we created in the last article, A Restaurant.
Also, as before, you are free to select a duration for how long you would like this slide to appear for.
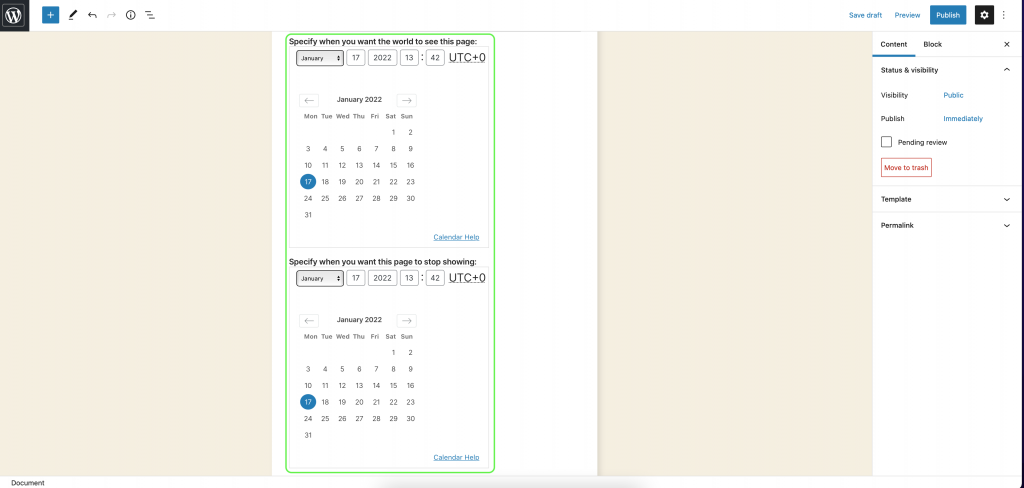
Next, select which dates you want this slide to be featured.
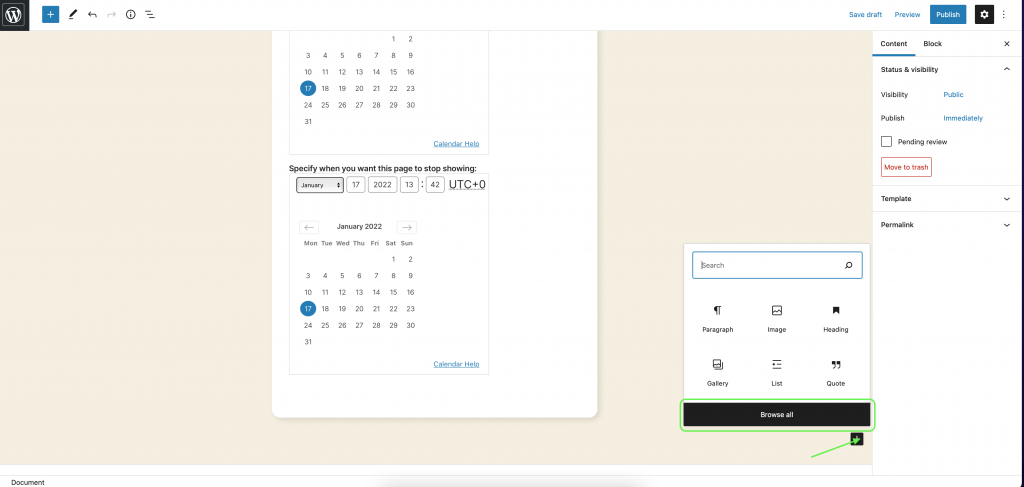
Now that you have made all of your selections, you can begin using the Block Editor. Those of you who are familiar with WordPress already know what tools are available to you. If not, click on the Plus Box for some options, then click on Browse All.
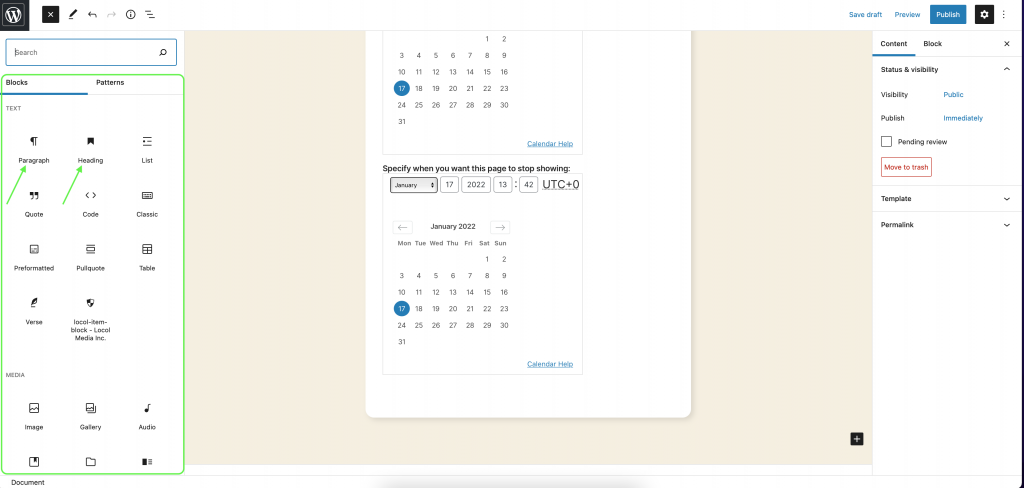
On the left you will see a full list of every tool at your disposal.
For simplicity’s sake, this article will just create use the Heading and Paragraph features just to illustrate how things should look once completed. Feel free to use any and all of the other options as needed.
Once you have added all the things you need for this slide, click on the Publish button. Then you can click on the WordPress logo to return to the Content page.
Back at the Content list, you can see the fourth slide for A Restaurant as part of the list.
Now that this slide is complete, you can go back to the Playlists tab to adjust their order, just like we did in the first article.
This concludes our coverage of the Block Editor feature and how it applies to the slides you can create here. We will continue to upload more articles to cover other features and tools we offer.