Hubs are used to organize playlists for sharing among Screen Locations. Playlists that are associated with a hub will be part of the content for any screen locations associated with the hub. A screen location can be associated with zero or any number of hubs, so hubs can be created for specialized groups or for organizing screen locations into regional hubs, etc.
Using the Hubs Menu
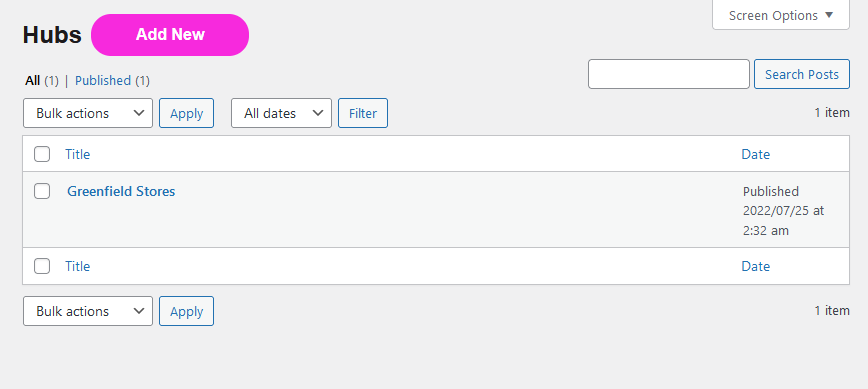
- Select Hubs from the navigation menu.
- The hubs list is sorted by create date and is in descending order.
- To sort by Title or by Date in ascending or descending order:
- Mouse over the Title field, click the upward arrow to sort in ascending order, and click the downward arrow to sort in descending order.
- Mouse over the Date field, click the upward arrow to sort in ascending order, and click the downward arrow to sort in descending order.
Creating a New Hub
- Click on the Add New button next to the title Hubs.
- On Add New Hub page, key in a name in the Enter Name of Hub field.
Organizing multiple Hubs
- Each Hub can be associated with one or more Screen Locations.
- Each Hub can be associated with one or more Playlists.
- Each Screen Location can belong to one or more Hubs, the slides played at the Screen Location is the totality of all the slides in all the Playlists associated with the Screen Location, and all the slides in all the Playlists associated with all the Hubs that the Screen Location is associated with.
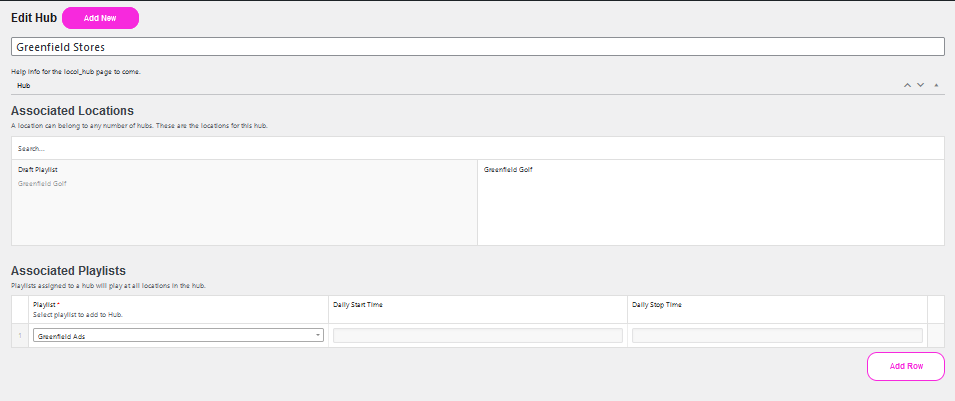
Associated Locations – Associating/Disassociating Hubs and Screen Locations
- There are two columns in the Associated Locations display. The left column has all available screen locations that have been created in the Screen Locations menu. If it is empty, create a new screen location first.
- The right column has the Screen Locations associated with this Hub. A Hub can have one or more screen locations associated with it.
- A screen location can be associated with a hub via the Screen Locations menu. The association will show in the right column. That association can be updated here. Any updates made also be reflected in the Screen Locations menu.
- To associate a screen location, do a wildcard search in the Search field if necessary. Select the desired screen location on the left column and it will be moved to the right column.
- To disassociate the relationship, select the desired screen location on the right column and click on the minus button next to it.
Associated Playlists – Associating/Disassociating Hubs and Playlists
- There are three columns in Associated Playlists. On the Playlist column, if the dropdown box is empty after clicking on the Add Row button, create a new playlist in the Playlists menu first.
- Daily Start Time and Daily Stop Time are read-only fields for information only from the Playlists menu. Daily Start Time and Daily Stop Time can be set in the Playlists menu.
- Playlists associated with this hub show up here. These associated playlists are shared by all screen locations associated with this hub.
- To associate a playlist to this hub, click on the Add Row button:
- On the playlist column, click the down arrow to pull down a list of available playlists. Click on the desired one to select.
- To change the daily start time and daily stop time, go to the Playlists menu to update.
- To disassociate:
- There are two buttons on the right side next to a playlist, the + button and the – button.
- The + button is Add Row which has the same result as clicking on the Add Row button.
- The – button is Remove Row which is to disassociate the playlist from the hub. A confirmation box pops up before removal, select Remove to disassociate or Cancel to exit.
Saving a Hub
- A hub can only be used in production when it is Published.
- To save work before it is ready for production, use Draft mode.
- The Save Draft button and Publish button are changed to the Update button for a saved hub. Click the Update button to save your changes.
- Click on the Save Draft button to save the hub in draft mode. To change the status from draft to published, simply click on the Publish button. To change the status from draft to pending review, click the Edit link next to it, select Pending Review from the dropdown box and click on the OK button to save, or Cancel to exit.
- Click on the Publish button to publish the Hub for use. The published date and time are shown. To change the status from published to pending review or draft, click the Edit link next to it, select Pending Review or Draft from the dropdown box and click on the OK button to save, or Cancel to exit.
- Visibility is set as Public by default. A Hub needs to be public to be used. Click the Edit link next to it, select Password Protected or Private, and click on the OK button to save, or Cancel to exit.
Searching for Hubs
- There are several ways to search or filter a hub list
- Hubs are grouped by All, Published, Draft, Pending, and Trash boxes. Each box has a count next to it.
- Wildcard search – key in some keywords in the field below the profile pic and click on the Search Posts button.
- Filtered by create date – click on the All Dates dropdown box, select month and year, and click on the Filter button.
Editing a Hub
- Select a hub from the Hubs list and go to the Edit Hub page, or
- Mouse over a hub from the Hubs list, the three links below it:
- Select Edit link goes to the Edit Hub page which has the same result as 1. above.
- Select the Quick Edit link to pop up the Edit box to easily update the name or its status. Click on the Update button to save or Cancel to exit.
- Select Trash link moves a hub to the Trash box. A Hub cannot be used when it has been trashed.
Deleting a Hub
- Follow 2.c. above, or
- In the Edit Hub page and in the Publish box, select the Move to Trash link.
Permanently Deleting a Hub or Restoring a Hub
- A deleted hub can be restored from the Trash box or deleted permanently from the portal. Select the Trash link from the Hubs list.
- On the trash hub list, mouse over the one and select the Restore link to move it back to the All box.
- On the trash hub list, mouse over the one or check all by clicking on the checkbox next to Title, select Delete Permanently link to delete these hubs permanently from the portal; or
- On the trash hub list, check all by clicking on the checkbox next to Title, then select Restore or Delete Permanently on the Bulk Actions dropdown box and click on the Apply button. Bulk action does not prompt with a confirmation box or a warning message.
Hubs – Bulk Edit Functionality
- The purpose of the Bulk Edit function is to update multiple hubs in one shot, similar to the status update or move to trash functions.
- Search or filter for a group of hubs, or go to any of the All, Published, Draft, Pending, or Trash boxes by selecting the link on the top.
- Check all by clicking on the checkbox next to Title, or click on the checkbox next to a hub individually, or multi-select by holding the Ctrl button on the keyboard and clicking on the checkbox next to a hub.
- To update the status of the list:
- Click on the Bulk Actions dropdown box, select Edit and click on the Apply button.
- A pull-down shows two columns, the left column is the list for bulk editing and the right column is the status dropdown box.
- On the left column, click on the cross next to a hub to take it out from the list before bulk editing.
- On the right column, select an action from the Status dropdown box.
- Click on the Update button to save or Cancel to exit.
- To update the status of the list:
- To delete the list:
- Click on the Bulk Actions dropdown box, select Move to Trash, and click on the Apply button. This moves the list to the Trash box.
- To restore or delete permanently from the Trash box, please see 4. in the Permanently Deleting or Restoring a Hub section above.