Locol Media provides a WordPress tool that adds digital signage as a new market for WordPress professionals. We use docker containers in our own application for WordPress and other services. In particular, we see containers as the method to allow a Marketing Agency or WordPress professional to host their own digital signage environment for their clients. There seems to be a lack of in-depth content available on using Docker containers for WordPress, so as part of our newsletter series, this is our contribution to the community.
Securing a WordPress site usually involves implementing tools such as WordFence. If the WordPress site also carries critical business functions, one might want to go beyond the standard tools. Agencies and WordPress professionals can use hosting partners to provide isolation between sites. Many though use their own servers (on AWS, Digital Ocean etc) and are looking at docker containers as the next step.
This article starts the process of securing a WordPress site by containerization, with a focus on the containerization process.
There are very good reasons to use containers for production WordPress, particularly for an enterprise or SaaS.
- Containers provide better isolation of the site with other sites or other enterprise systems while allowing integration with those systems.
- Containers can be assembled from your git repository and other known and vetted sources of code, reducing the attack surface.
- Containers fit into the Cloud Native infrastructure that many enterprises or SaaS already operate in or are migrating to. (Here is an article describing our WordPress infrastructure and how we manage the WordPress development life cycle).
This article assumes basic knowledge of WordPress’s architecture and basic knowledge of containers. If you are just starting your discovery into containers, here is a good introduction to bringing WordPress up in a container. Here is a good write-up on doing it in a cloud-native environment.
Though there are ready-made WordPress containers, in a secured production environment one usually desires much tighter control over the container build.
- Many enterprises or SaaS work has to go through dev and testing stages that are not necessarily containerized, and deployed into a container as part of a CI/CD pipeline.
- Building the container from a PHP base image allows better control of the build content, limiting content to only what’s needed for the build.
- Options for PHP, Apache, and Linux should be tuned to the requirements of the build.
- Containers can be used to bundle or conversely isolate system functions, making developing, debugging, and security easier.
We will go through the process of using the wp-docker script to bring up a test site in docker. Then this article will do a deeper dive into the container and discuss the customization of the container to your needs.
1, Git Clone the script
Git Clone the wp-docker repository onto your dev server where you have been testing the WP site that is going to production. The wp-docker scripts are bash scripts and the assumption is that the dev server is a Linux environment. The other assumption is that we will use sftp to deploy this to another Linux VM, which will be the production server.
Our test environment for the script is a set of Ubuntu Servers running on Hyper-V on a Windows box. Git clone the repro and set the scripts to be executable.
git clone https://github.com/locol-media/wp-docker.git
cd wp-docker
sudo chmod a+x *.sh
2, Set up the Parameters
The wp-docker-prep.sh script sets up the work directory within the build context that you have downloaded. The script is designed to consume its parameters in the form of environment variables. This allows the script to be embedded in other scripts that may prep the parameters by means other than export commands. To try the script, edit the script with your favorite editor and change the export commands at the top. The following are the parameters of the wp-docker-prep.sh script:
#!/bin/bash

export DEV_SITE=/var/www/test-user-site/
export WP_SQL_USER=wordpress
export WP_SQL_HOST=localhost
export WP_SQL_DB=test_user_site- DEV_SITE: The location of your WordPress files on this server. This is usually a folder under /var/www/
- WP_SQL_USER: MySQL ID for the WordPress site
- WP_SQL_HOST: location of MySQL, eg: localhost
- WP_SQL_DB: Name of the relevant MySQL database
Run the wp-docker-prep.sh script
./wp-docker-prep.sh3, Build the container
The wp-docker-build.sh script is designed to consume its parameters in the form of environment variables. This allows the script to be embedded in other scripts that may prep the parameters by means other than export commands. To try the script, edit the script and change the export commands at the top. The following are the parameters of the wp-docker-build.sh script.
#!/bin/bash

export UPLOAD_SIZE=8M
export CONTAINER_REGISTRY=locolmedia
export CONTAINER_NAME=sample_container
export CONTAINER_TAG=NOW- UPLOAD_SIZE: WordPress media upload size. The build-php folder contains a couple of sample PHP options file. You can put your desired options into this folder and it will be included in the build. The build-apache2 folder contains the apache parameters.
- CONTAINER_REGISTRY: URL of your container registry, or Docker Hub name. In our test, we use our own registry in the Docker Hub: locolmedia
- CONTAINER_NAME: The container name. For the test, we will use sample_container.
- CONTAINER_TAG: This is a tag to identify the version of the container being built. If the tag is “NOW”, wp-docker will insert a tag in the form of the current date and time.
If you do not have a container registry, you can get a free public registry at Docker Hub, or at any of the clouds (Azure, Google Cloud, AWS, Digital Ocean).
For our sample run, we will use our Docker Hub account as a public container registry. We will tag it with “NOW” so that the script will assign a tag derived from DateTime. In this demo, the container name will look like this: locolmedia/sample-container:yymmddhhss
Log into your container Registry first, if you have not already.
docker loginAssuming you have changed the parameters, run the script. The script in its present form might prompt for sudo credentials and the mySQL password. You can modify this behavior in the script.
./wp-docker-build.shLook for these messages to see that your container was built and tagged successfully.

Then look for these types of messages to see that the container was pushed successfully.

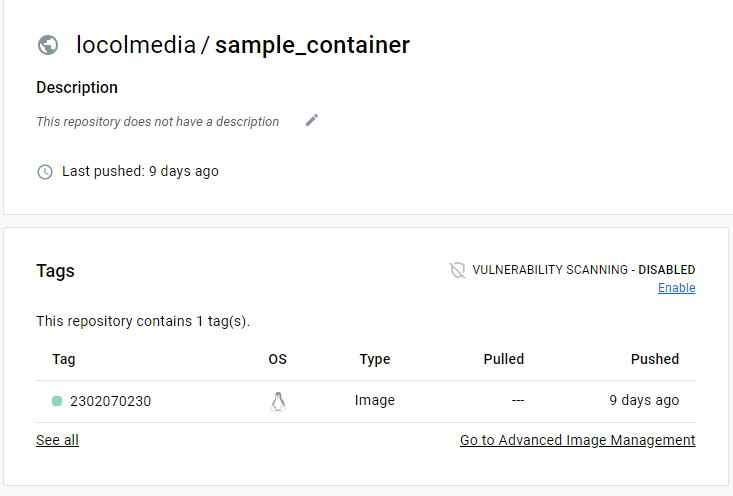
You should be able to go to your container registry and see your container there. Here is it in our registry on Docker Hub:
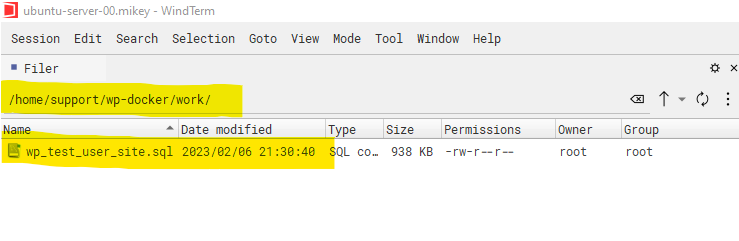
The sqldump file will be inside the work folder. Here it is on my dev server.
4, SFTP the sqldump file to your production server
Copy the sqldump file and the required scripts to your production server using your favourite tool. Here is using sftp to do the copying:
sftp support@ubuntu-server-01.mikey
sftp> put wp-mysql-*.sh
sftp> put wp-docker-run.sh
sftp> mkdir tempwpfiles
sftp> cd tempwpfiles
sftp> lcd work
sftp> put wp_test_user_site.sql
5, bringing up MySQL as a docker container
You can use a mySQL server that is already installed on the production server, or you can use the wp-mysql-build.sh script to create a mySQL server using a docker.
To set up a MySQL server for the first time, credentials do have to be created… I created two scripts: wp-mysql-build.sh to build the server, and wp-mysql-run.sh to operate the server afterward.
Update the wp-mysql-build.sh script with your passwords, but remember to remove the script afterward!!
#!/bin/bash

MYSQL_ROOT_PASSWORD=thisisadummyRooTpassword!99887
MYSQL_DATABASE=wp_docker
MYSQL_USER=wp_user
MYSQL_PASSWORD=thisIsaDummyPassword!34534
The script uses the docker run command, which requires an absolute path in the volume parameter. Modify <your_home_dir> to point to the directory where you had uploaded the script to.
sudo docker run --name wp-mysql -v /var/wp-mysql/mysql-data:/var/lib/mysql -v <your_home_dir>/tempwpfiles:/docker-entrypoint-initdb.d -p 3310:3306 -d \
 -e MYSQL_ROOT_PASSWORD=$MYSQL_ROOT_PASSWORD \
 -e MYSQL_DATABASE=$MYSQL_DATABASE \
 -e MYSQL_USER=$MYSQL_USER \
 -e MYSQL_PASSWORD=$MYSQL_PASSWORD \
  mysql:8.0.29  --character-set-server=utf8mb4 --collation-server=utf8mb4_unicode_ci
Then run the wp-mysql-build.sh script.
chmod a+x *.sh
./wp-mysql-build.sh
Use docker logs to look at the log generated and verify that the sqldump file was consumed.
sudo docker logs wp-mysqlYou should see this message.

Now is the time to remove the wp-mysql-build.sh script with your passwords in it.
Stop the mysql container and restart the container with the wp-mysql-run.sh script. The wp-mysql-run.sh script also has the –restart unless-stopped option so that your mysql server restarts after a reboot.
sudo docker stop wp-mysql
sudo docker rm wp-mysql
./wp-mysql-run.sh
6, bringing up the WP docker
Set up wp-docker-run.sh with the right registry and container names.
#!/bin/bash

export CONTAINER_REGISTRY=locolmedia
export CONTAINER_NAME=sample_container
Run the script.
./wp-docker-run.shThis will bring up your site. You should be able to test the site now, perhaps with a host file entry on your local machine.
Display your running containers to verify the status.
sudo docker psYou should see something like this.

7, Going inside the container
If there is a need to go inside the container, use the following command, where <containerName> is the name you used. The default is wp-docker.
sudo docker exec -it <containerName> bashThe default build bundles in WP-CLI. The simplest way to use WP-CLI is to go to the root of the site and execute your WP-CLI commands there.
Customization Notes
Customize your container by reviewing the following notes on the contents of the Dockerfile. Customization ranges from specifying different PHP and OS versions to customizing apache and PHP options and extensions.
FROM php:7.4-apache-bullseye

LABEL maintainer="mikep@locol.media"

ARG UPLOAD_SIZE=8M
ARG APACHE_SERVER_ADMIN
ARG WORDPRESS_FILES

ENV APACHE_SERVER_ADMIN=${APACHE_SERVER_ADMIN}
ENV APACHE_DOCUMENT_ROOT=/var/www/html

RUN a2enmod rewrite expires remoteip

# install the PHP extensions we need
RUN apt-get update && apt-get install --no-install-recommends -y msmtp less mariadb-client libfreetype6-dev libpng-dev libwebp-dev libjpeg-dev libmagickwand-dev libzip-dev tcpdump nano \
    && rm -rf /var/lib/apt/lists/* \
    && docker-php-ext-configure gd --with-freetype --with-jpeg --with-webp \
    && docker-php-ext-install -j "$(nproc)" bcmath exif gd mysqli opcache zip

RUN pecl install imagick-3.4.4 \
    && docker-php-ext-enable imagick

RUN  echo 'upload_max_filesize = $UPLOAD_SIZE' >> /usr/local/etc/php/conf.d/upload.ini
COPY build-php /usr/local/etc/php/conf.d/
COPY build-apache2/000-default.conf /etc/apache2/sites-available/000-default.conf
COPY build-apache2/ports.conf /etc/apache2/ports.conf

COPY $WORDPRESS_FILES /var/www/html

RUN mkdir -p /tmp/opcache \
    && chown -R www-data:www-data /tmp/opcache \
    && chown -R www-data:www-data /var/www/html/wp-content/uploads \
    && : > wp-content/debug.log


### WP-CLI
RUN curl -SL https://raw.githubusercontent.com/wp-cli/builds/gh-pages/phar/wp-cli.phar -o /usr/local/bin/wp \
    && chmod +x /usr/local/bin/wp


USER www-data
CMD apache2-foreground

EXPOSE 8080
Notes on The DockerFile
Line 1: Specify the PHP version. To find different versions available, go to Docker Hub https://hub.docker.com/_/php/ and locate your desired version.
Lines 12: Specify your required apache modules.
Lines 15-21: Build the Linux and PHP environment with your required extensions. I like to include tcpdump and nano for debugging purposes.
Lines 23-26: Insert apache and PHP option files from the repo, from the build-apache2 and the build-php directories
Lines 28-33: Set the right file permissions for folders that need to be writable. You should minimize this list. In a la
Lines 37-38: Install WP-CLI
Lines 43-46: Runs apache as non-root for better security.
Notes on the build scripts.
The wp-docker-prep.sh script is designed to be customized for your environment. It copies the WP files from your dev folder into the work folder, and then does a mysqldump to retrieve the database.
#!/bin/bash

export DEV_SITE=/var/www/test-user-site/
export WP_SQL_USER=wordpress
export WP_SQL_HOST=localhost
export WP_SQL_DB=test_user_site

export WORK_DIR=work
mkdir ${WORK_DIR}
cp -a ${DEV_SITE}. ${WORK_DIR}/tempwpfiles/
mysqldump -R -f --no-tablespaces -u ${WP_SQL_USER} -p --host ${WP_SQL_HOST} ${WP_SQL_DB} > ${WORK_DIR}/wp_${WP_SQL_DB}.sql
#!/bin/bash
export UPLOAD_SIZE=8M
export CONTAINER_REGISTRY=locolmedia
export CONTAINER_NAME=sample_container
export CONTAINER_TAG=NOW
export WORK_DIR=work
TIMESTAMP=`date +%y%m%d%H%M`
if [ "$CONTAINER_TAG" = "NOW" ]
then
export CONTAINER_TAG=$TIMESTAMP
fi
sudo docker build \
--build-arg UPLOAD_SIZE=${UPLOAD_SIZE} \
--build-arg APACHE_SERVER_ADMIN=admin@dummyaccount.com \
--build-arg WORDPRESS_FILES=${WORK_DIR}/tempwpfiles/ \
-t ${CONTAINER_REGISTRY}/${CONTAINER_NAME}:${CONTAINER_TAG} \
.
sudo docker push ${CONTAINER_REGISTRY}/${CONTAINER_NAME}:${CONTAINER_TAG}The wp-docker-build.sh script is designed to be customized for your environment:
Lines 3-6: Set the environment vars for the script. See the descriptions above. In practice, you will probably set these via an outer script or via your CI/CD tool.
Lines 10: this creates a docker tag to timestamp the container
Lines 17-23: Build the container. Note the period on line 29 denotes the current directory as the container context.
Line 25: Pushes the container to the container registry
Notes on Run Time Considerations
Here is the documentation on Docker restart policy. The default in the script is –restart unless-stopped. You might consider the other options though unless-stopped is a safe default. The danger is that if there is a problem with your site, and it is never ending restarting, you might not know.
One of the most important features of a container is that when reloaded, the original docker is removed. This has an important impact on your WP site. Containerization works best when the file structure is static. Changes are lost when a site is reloaded. For most WordPress functionality, the file system does remain static, however, the following actions do produce changes to the file system:
- Version upgrades of WordPress or plugins
- Adding new plugins
- Upgrading or modifying your child theme
- Some plugins use the file system as a data store or cache: WordFence, Beaver Builder, etc
- Uploading images or assets to the site
In the secured Enterprise scenario that we are reviewing, one should pretty well NEVER do the first three items on the live site. The container would/should be generated from a dev site where these changes are made and tested.
Handling #4 is straightforward. You should know about any plugins that generate changes in the file system, for security reasons, and you have to enable that. See LInes of wp-docker-deploy.sh for our handling of WordFence
Uploads can be handled the same way as #4, by putting a volume onto the server. A better approach would be to move uploads to external storage, such as AWS S3. If those are images, you also gain the benefit of better latency to those images.
Next Steps
Putting the WordPress site into a container is just one step in securing the site. WordFence or other tools should already be part of this solution. From here, there are other steps one should take to further harden the container. I will write about those steps in upcoming articles.
- Setting Security Headers to further secure your site
- SSL Handling within a WordPress containerized environment
- Changing host names in a WordPress containerized environment
- Problem investigation and logging in a WordPress containerized environment
- Running with Docker Compose, or K8s